Kata
Kata are the formal sequences at the heart of Kyokushin. Every movement is set out below, step by step, with the photographs that go with it. Choose a kata from the list to begin.
Select Kata
Seienchin
Storm within the calm. The name indicates the need to overcome the weakness of the spirit and supress the desire to give up. Strength through determination. When the body is exhausted, a strong spirit will always carry you through
- Approximate performance time
- 1 minute 24 seconds minimum; 1 minute 27 seconds maximum
- Stances
- Fudo Dachi Musubi Dachi Uchi-Hachi-Ji-Dachi Yoi Dachi Kiba Dachi Moro Ashi Dachi Kokutsu Dachi Neko Ashi Dachi Sanchin Dachi
Seienchin
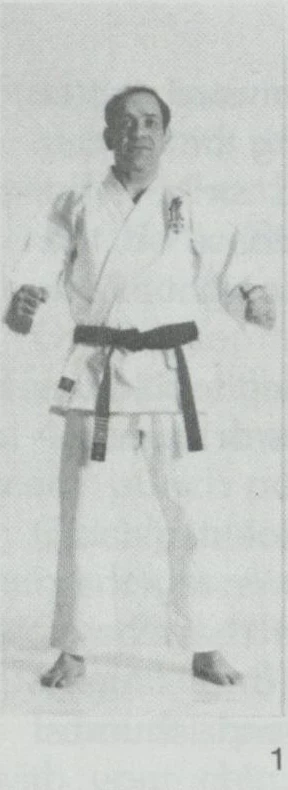
Start the kata in fudo dachi (fig. 1).
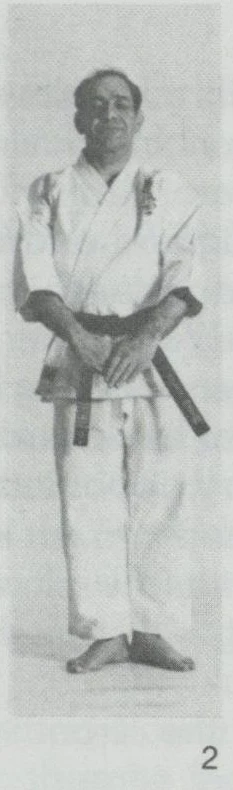
Move into musubi dachi and mokuso on the command “Mokuso” (fig. 2).
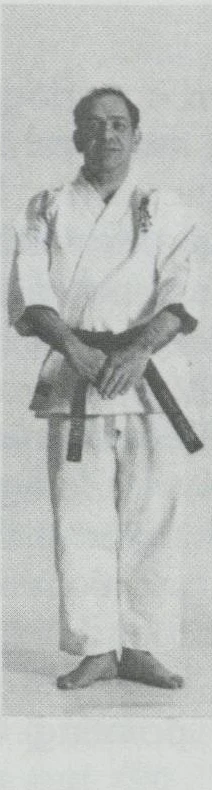
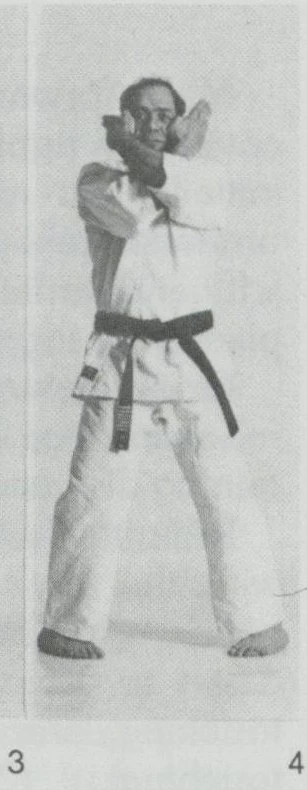
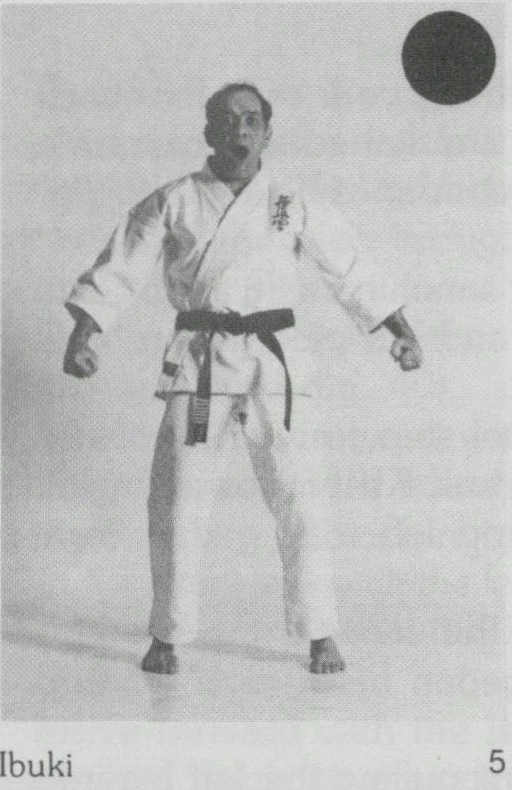
On the second command “Seienchin”, open eyes, move into the yoi position with ibuki (figs. 3 to 5).
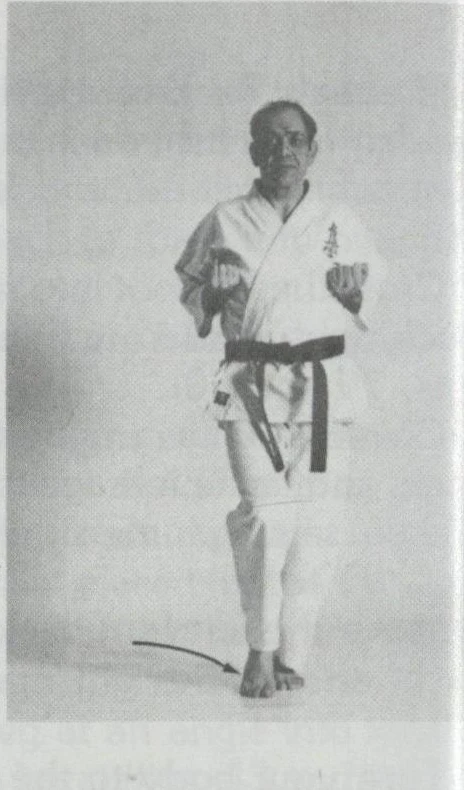
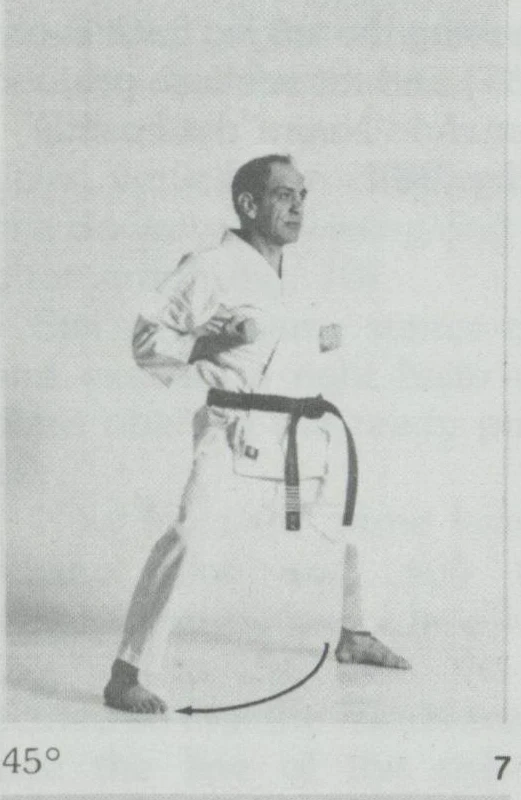
On the command “Hajime” move the right leg forward to the right in a circular movement into kiba dachi at 45° and simultaneously bring both fists back to the ready punch position (figs. 6 and 7).
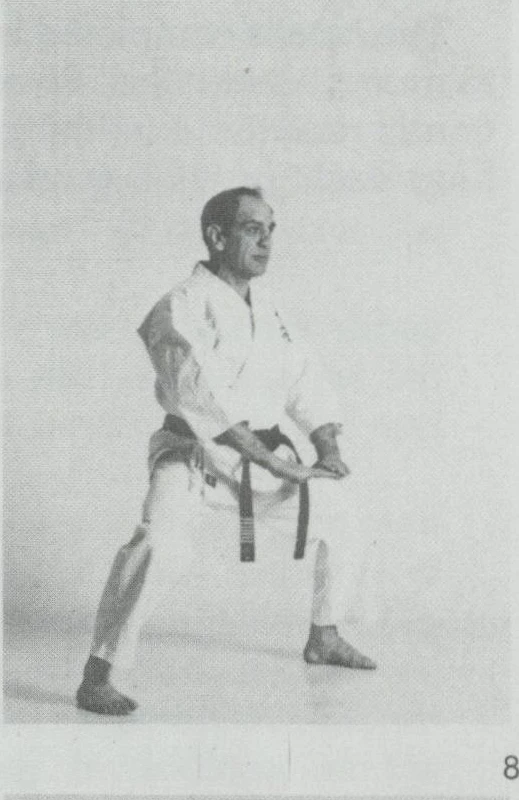
Quickly block morote shotei gedan uke with the hands crossed to finish level, with and in front of the groin so that the fingers of the left hand are on top of the right (fig. 8).
From this position slowly bring both hands up level with your chin, thumbs facing out (fig. 9) (n.b. this movement begins by twisting your hands towards your body so that the backs of the hands are touching).
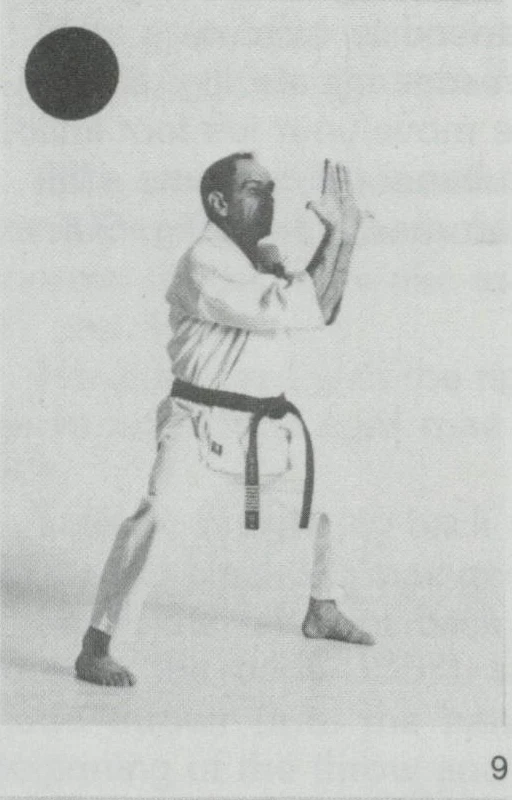
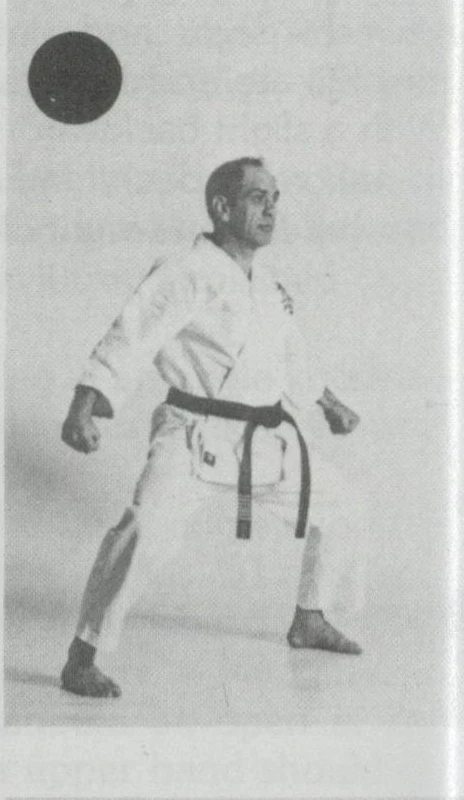
Close both hands and, as if gripping bring both fists down vertically to chin level then slowly bring the fists in a downward twisting and outward direction as in the photograph (fig. 10).
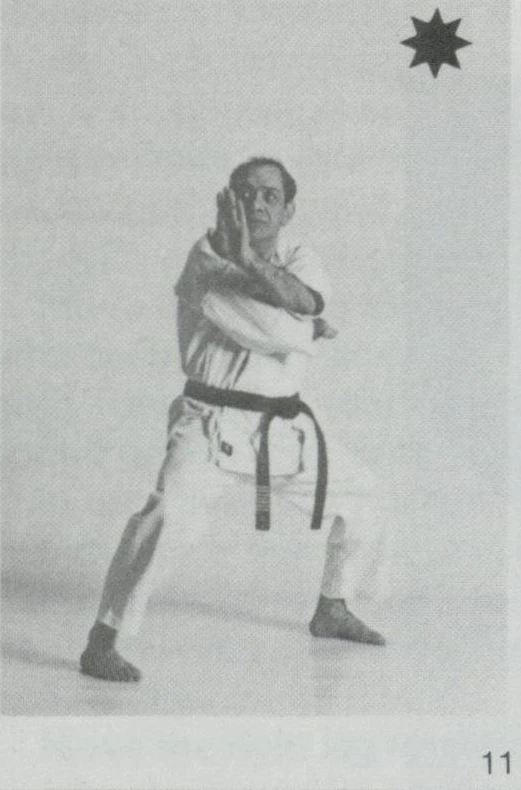
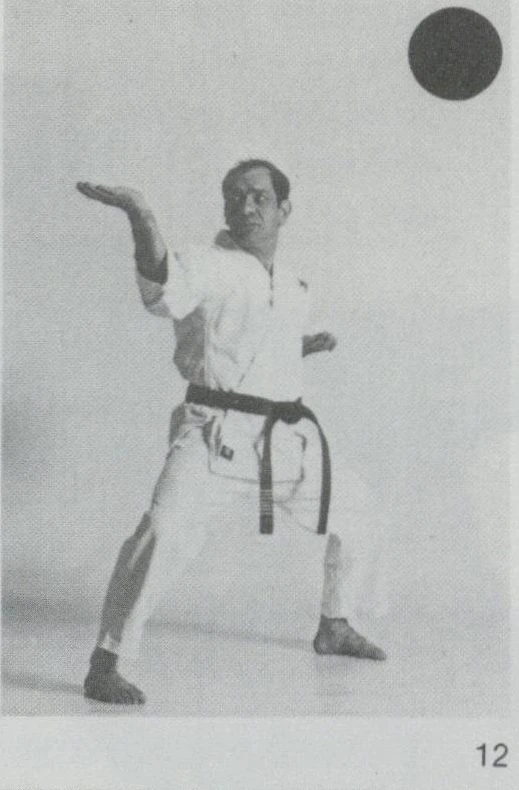
Still in the same stance cover with a fast left shotei and execute a right haito uchi uke returning the left hand open to the ready punch position (figs. 11 and 12).
Now from the same hand position execute a right tensho uke and pull towards the body and simultaneously execute a left yonhon nukite chudan (figs. 13 to 15). (N.b. the above techniques are executed so that the hands are at an angle which is just inside the line of the right leg. In addition all the movements shown from figs. 9 to 15 are executed slowly, with the exception of the cover which is done fast. Finally you should look at 45° whilst performing the movements shown in figs. 11 to 15. This principle is maintained in the following similar movements i.e. figs 16 to 25 and 26 to 35).
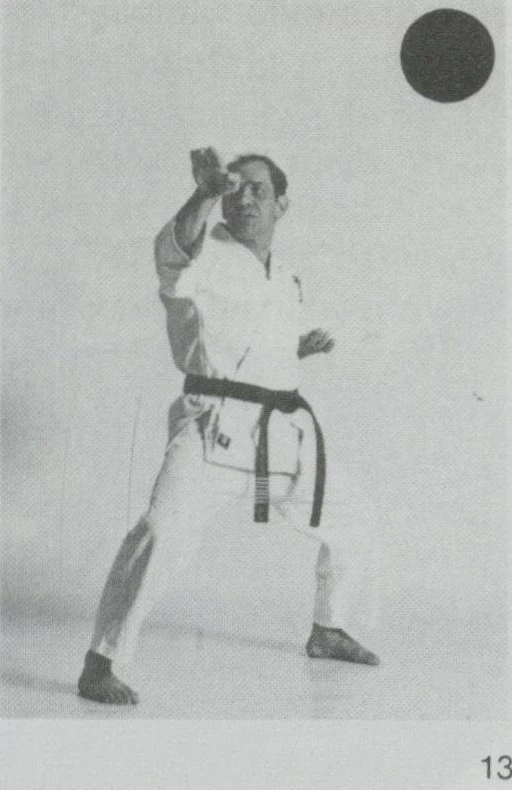
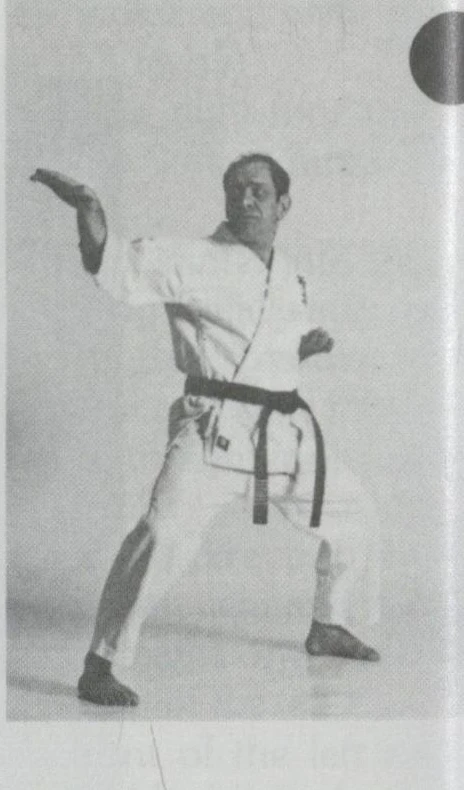
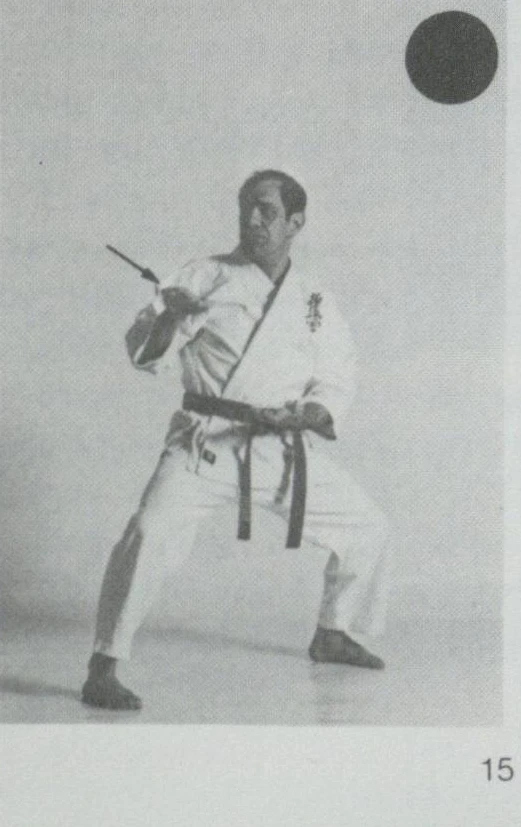
Move the left leg forward in a circular movement into kiba dachi at 45° and as previously explained returning both fists to the ready punch position, block morote shotei gedan uke, bring both hands up level with your chin and twist both hands out (figs. 16 to 20).
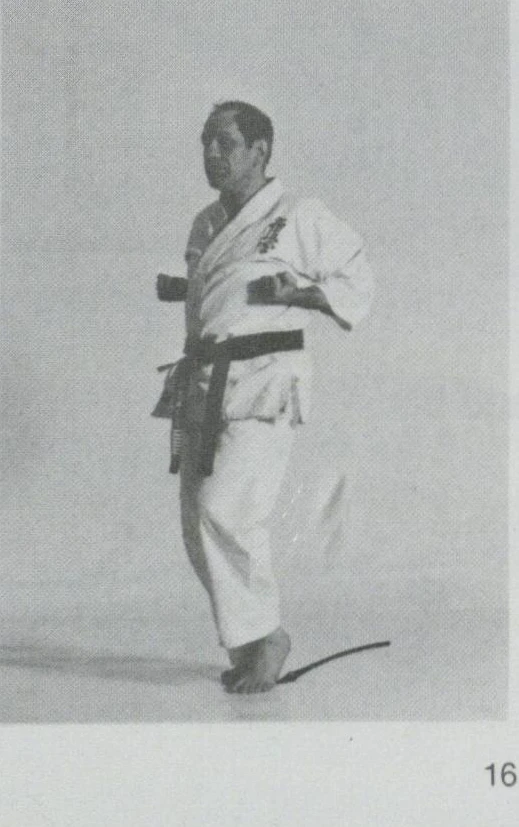
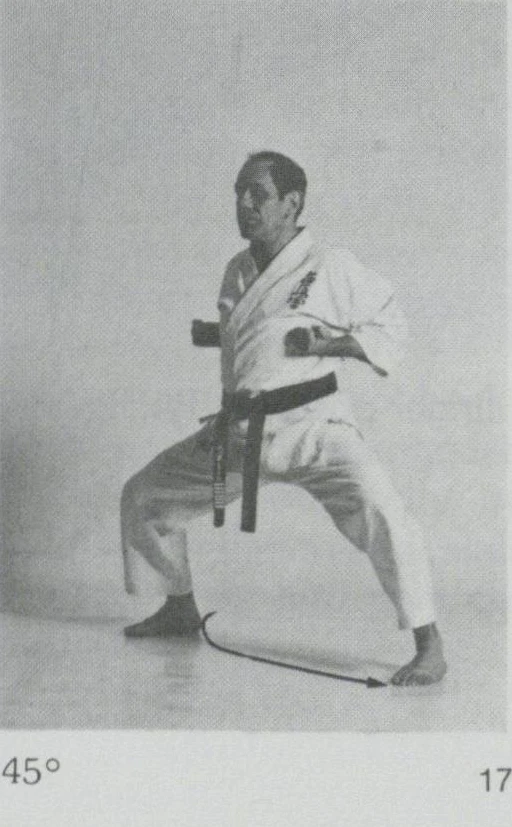
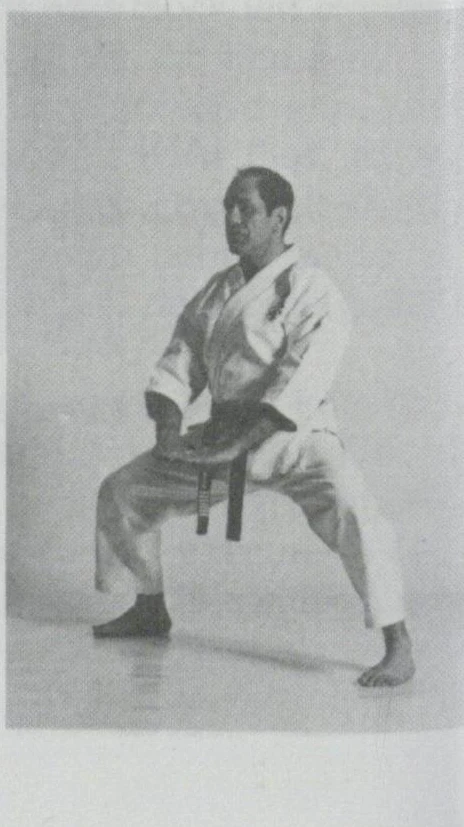
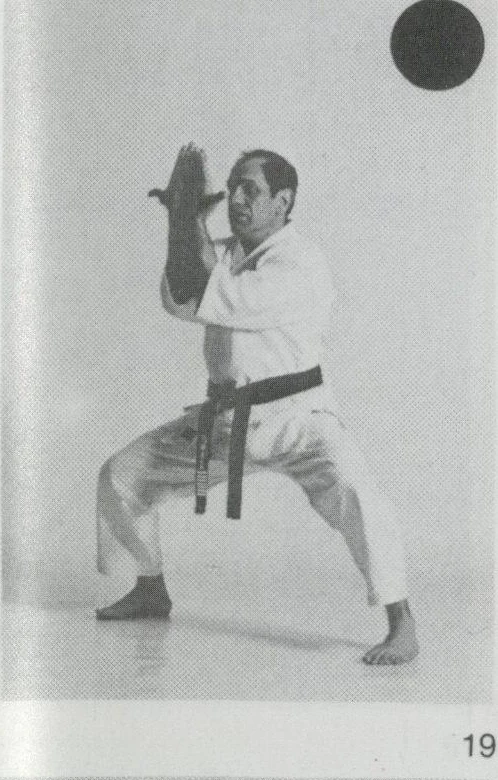
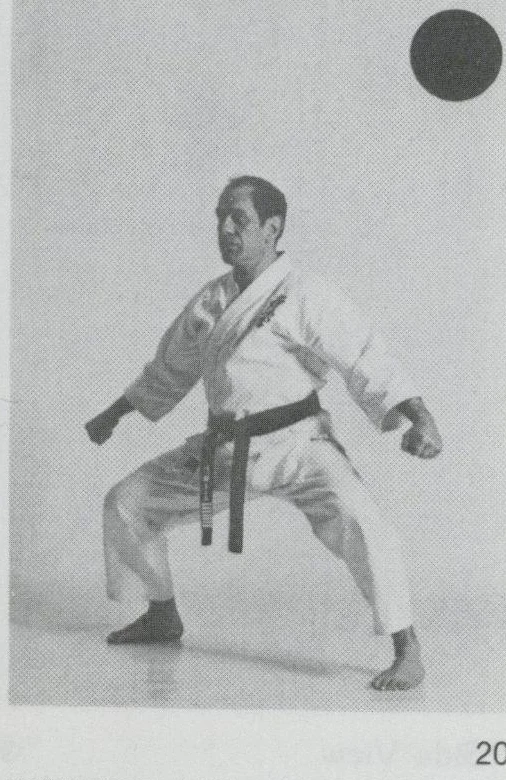
Execute a fast right shotei cover and perform a left haito uchi uke and execute a left tensho uke pulling the hand towards the body and perform a right yonhon nukite (figs. 21 to 25).
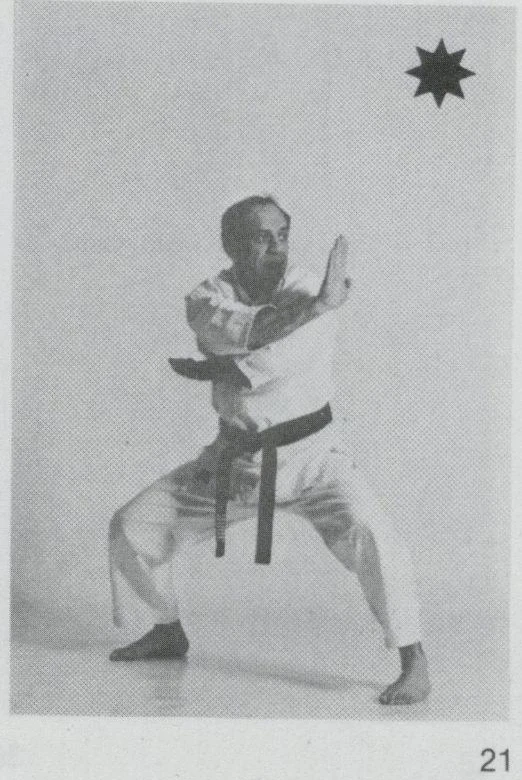
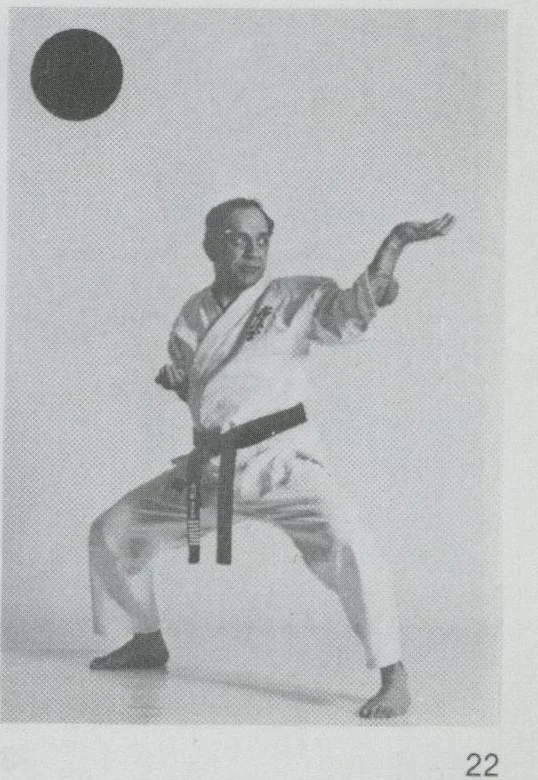
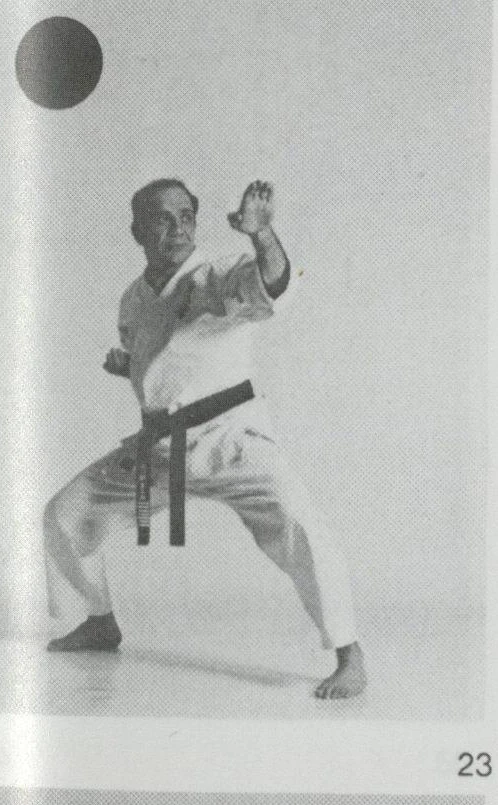
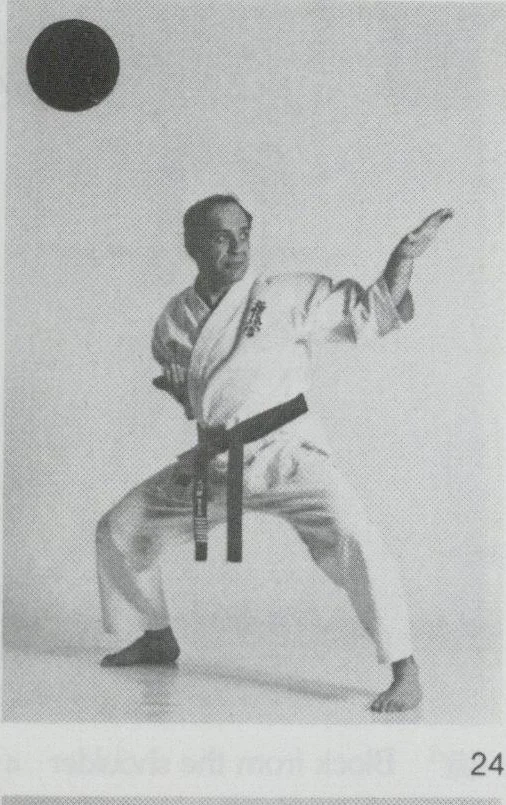
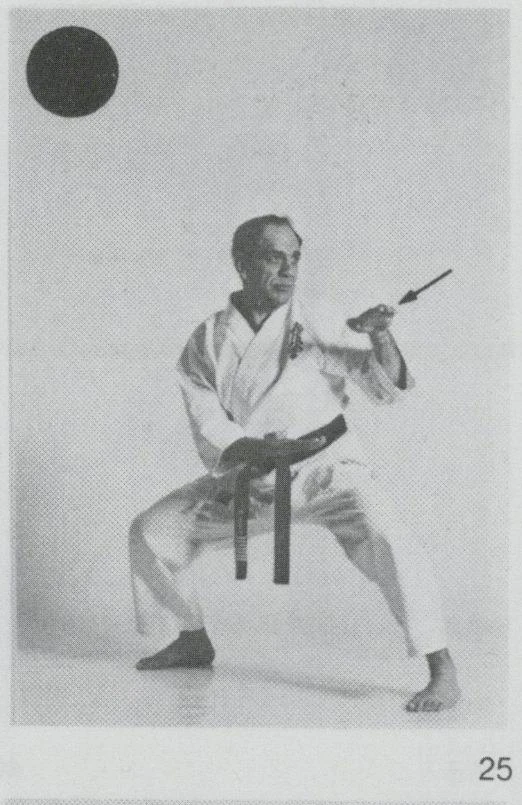
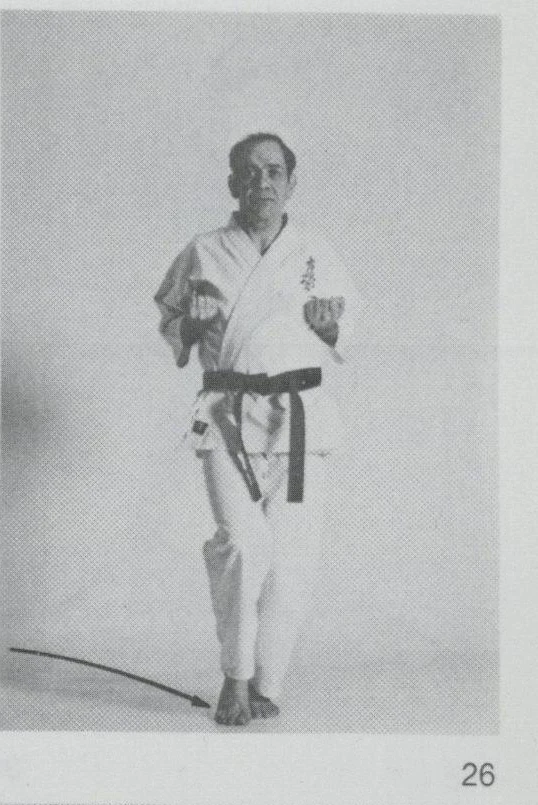
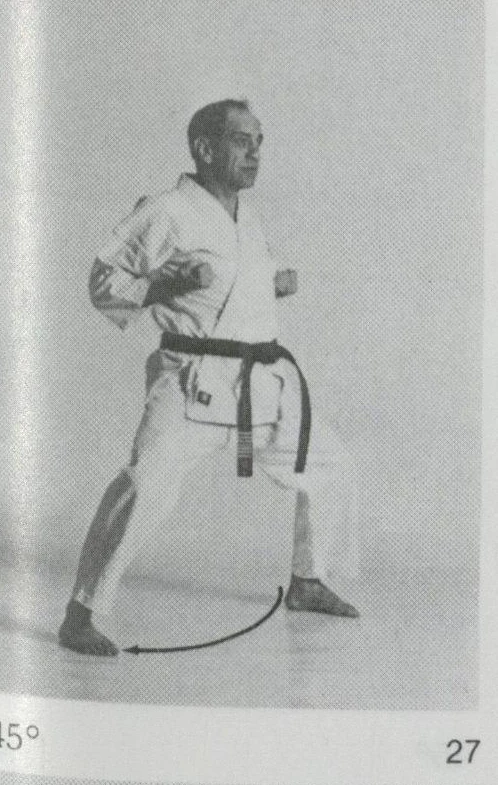
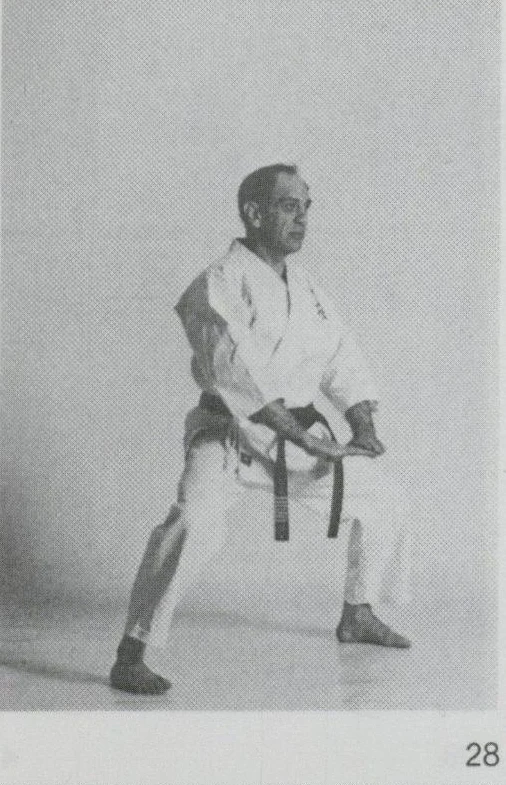
Move the right leg forward in a circular movement into kiba dachi at 45° as previously explained, returning both fists to the ready punch position, block morote shotei gedan uke, bring both hands up level with your chin and twist both hands out (figs. 26 to 30).
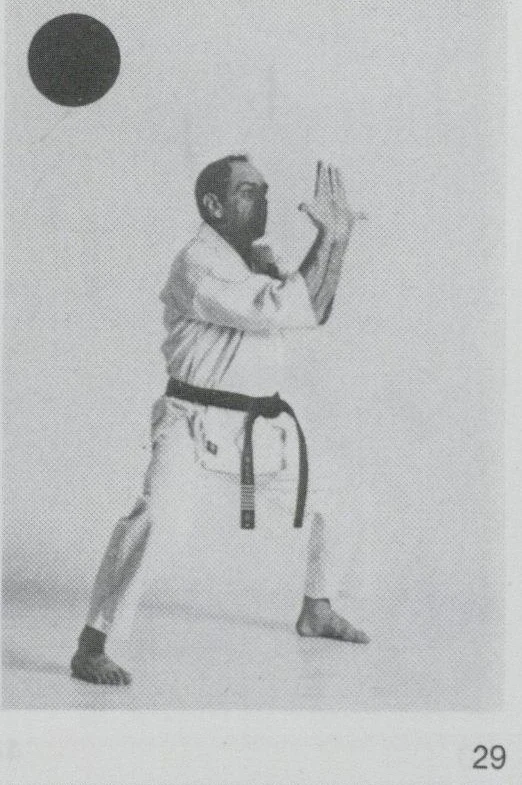
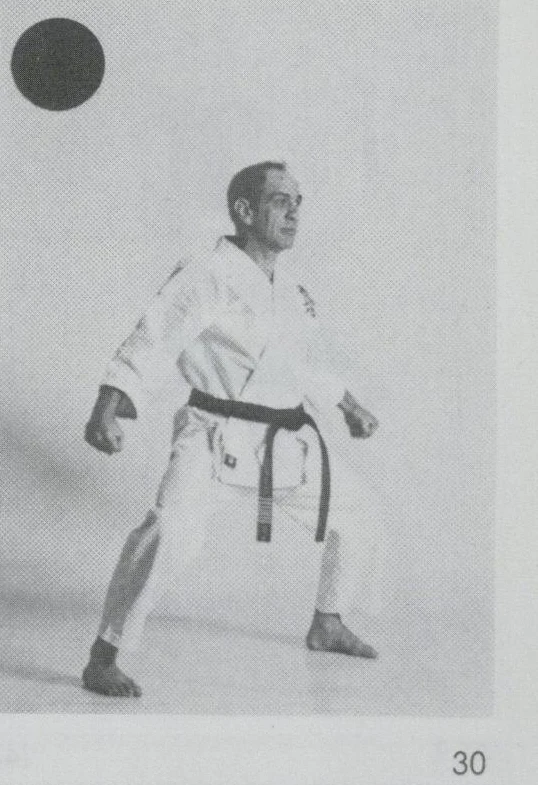
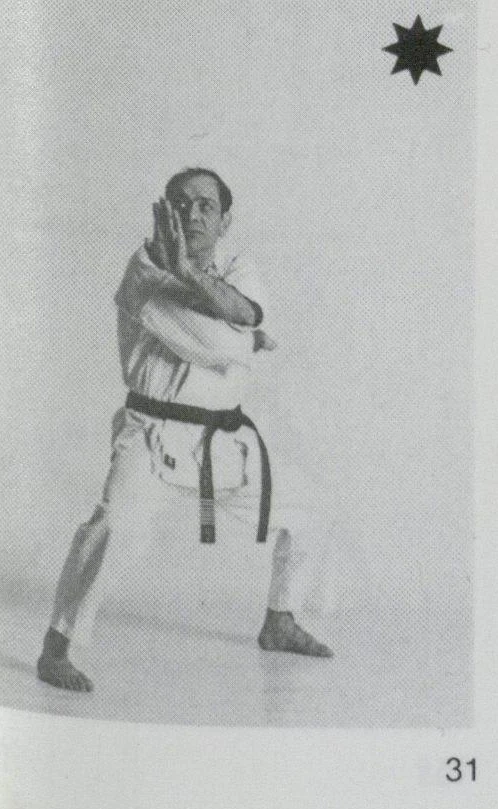
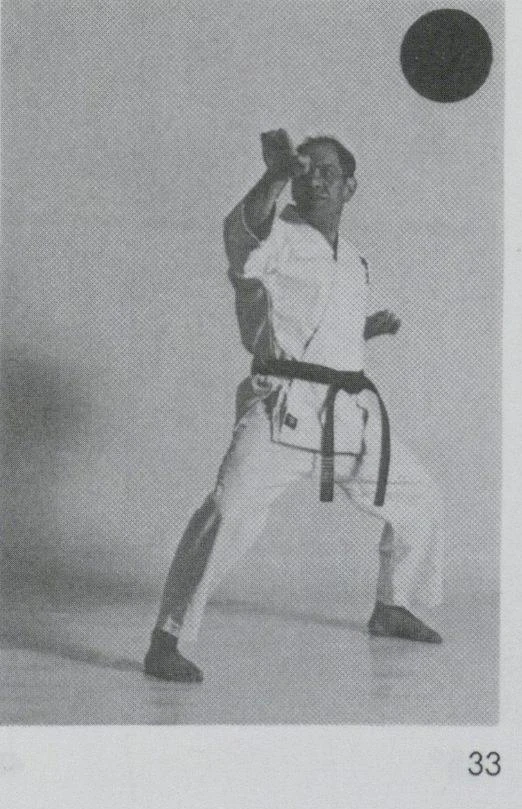
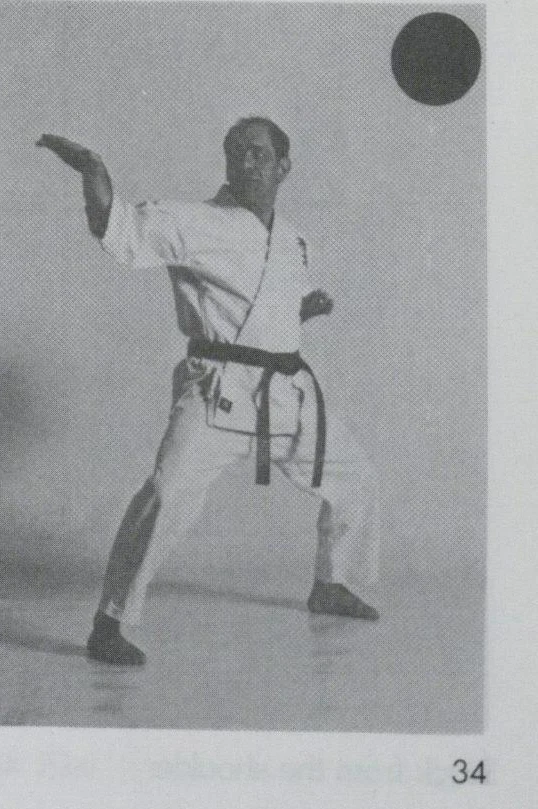
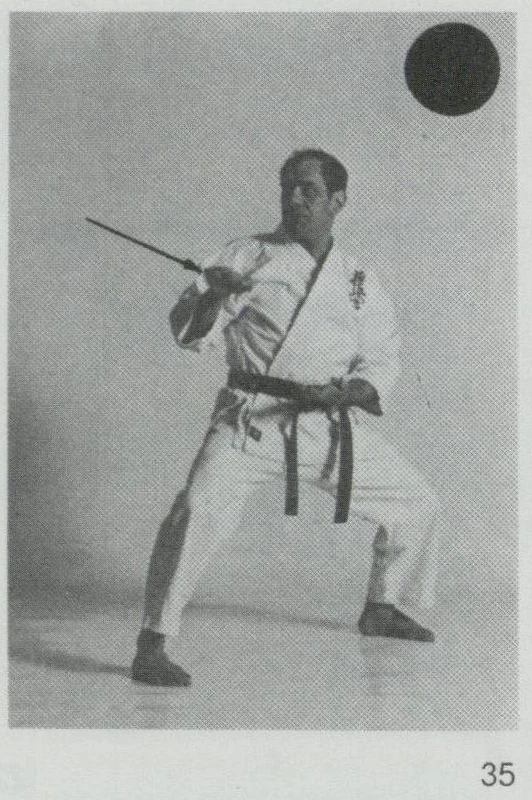
Execute a fast left shotei cover and perform a right haito uchi uke and execute a right tensho uke pulling the hand towards the body and perform a left yonhon nukite (figs. 31 to 35).
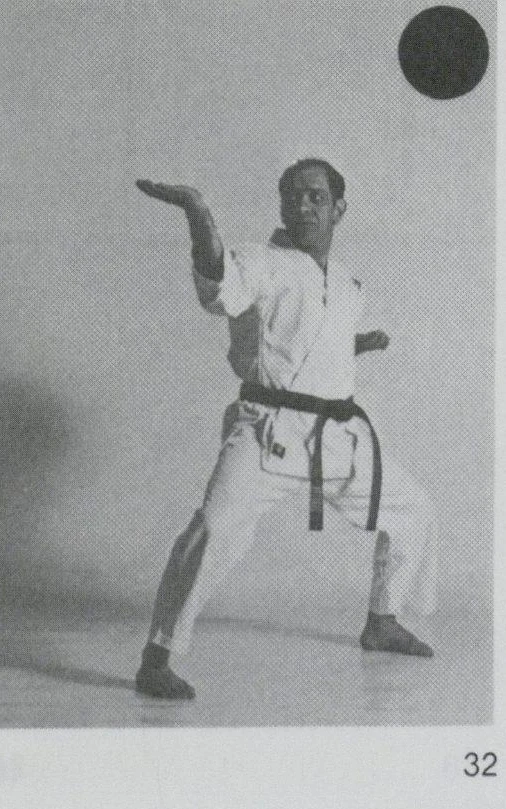
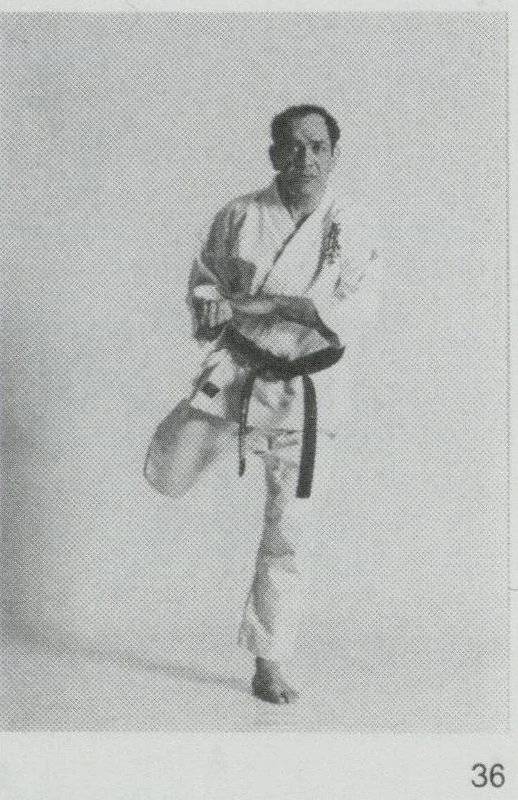
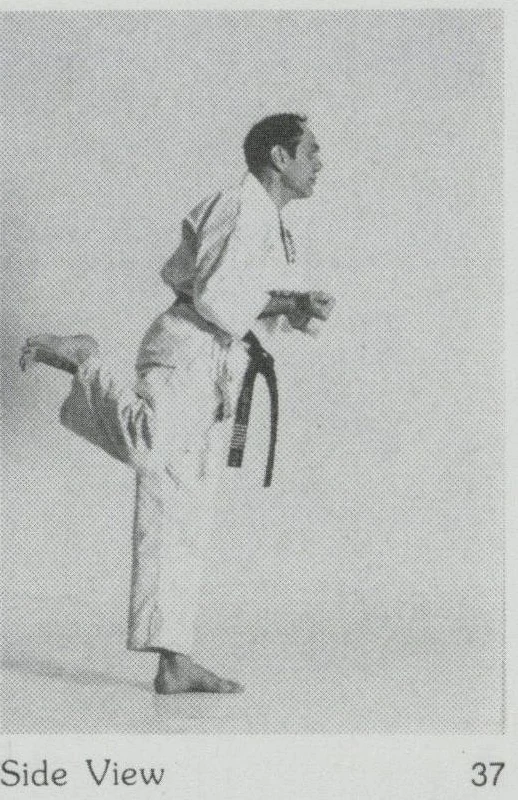
From this position bring your right foot back and kick age kakato ushiro geri and at the same time strike right ushiro hiji ate with the left palm placed on top of the right fist (figs. 36 and 37).
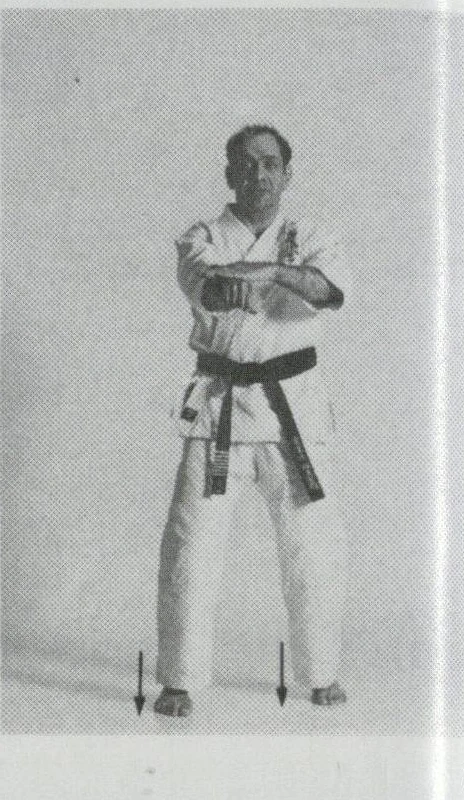
Move forward into right moro ashi dachi and punch right chudan tsuki with the left palm placed on the right wrist (fig. 38).
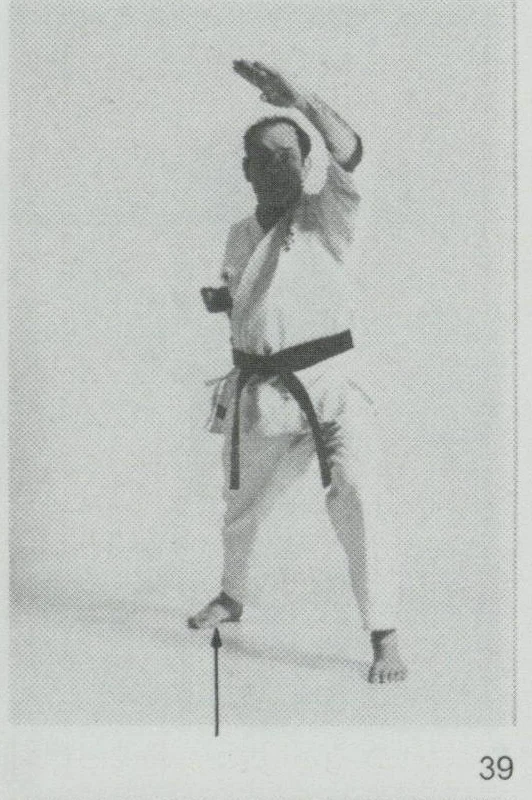
Quickly move the right foot back into left zenkutsu dachi and position the left hand (arm extended palm facing down) as if to grab an opponents neck, the right fist is simultaneously brought back to the ready punch position (fig. 39).
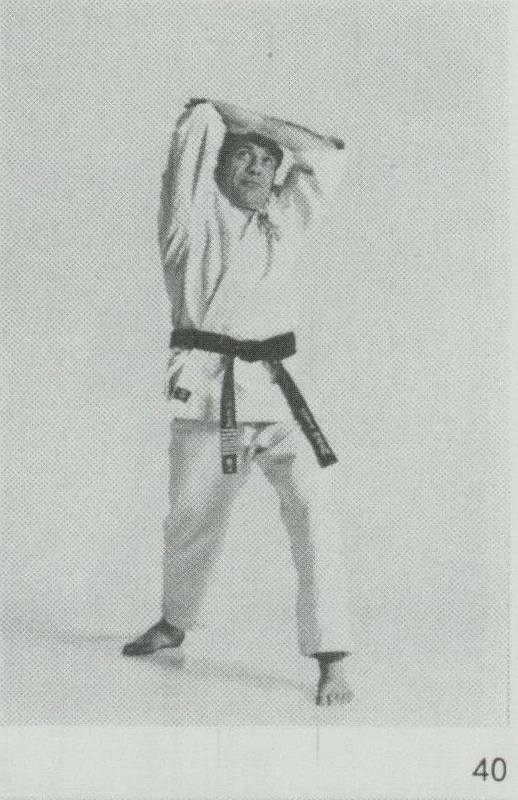
Quickly strike right jodan age hiji ate hitting the palm of the left hand (fig. 40).
Slowly move forward with the right leg in a circular movement into right kokutsu dachi at 45° and at the same time slowly block right morote chudan uchi uke from the shoulder — with the left palm placed on the inside of the right arm so that the finger tips are touching the wrist (figs. 41 and 42).
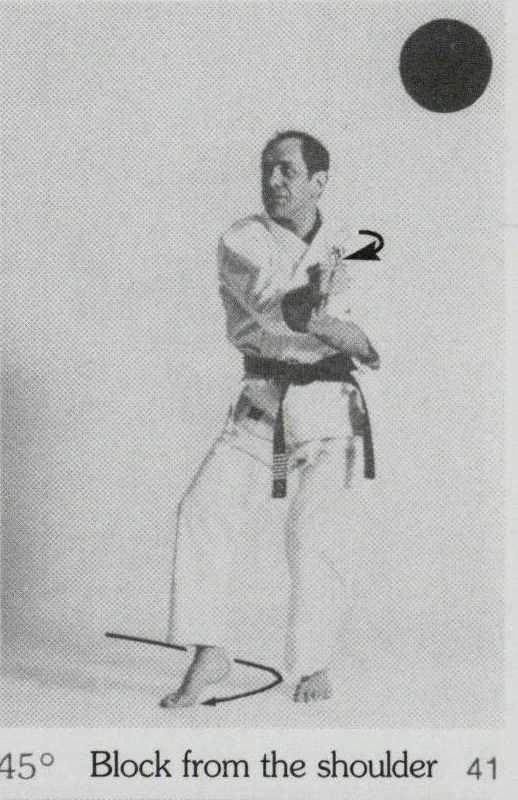
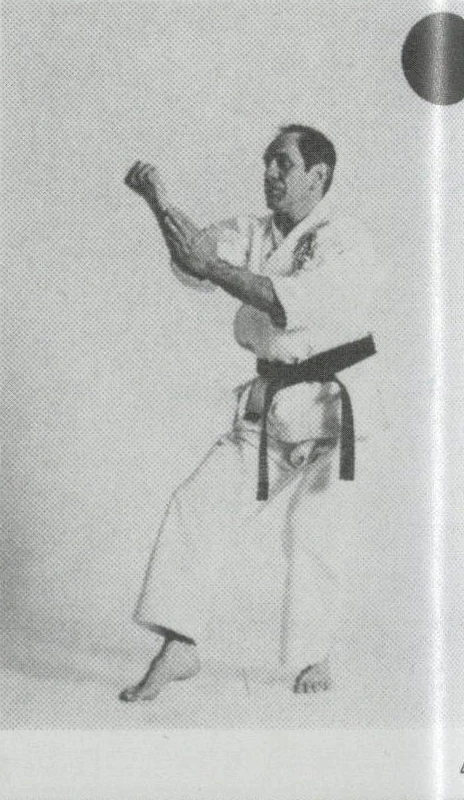
Move forward with the left leg at an angle into kiba dachi and block left mae gedan barai (figs. 43 and 44).
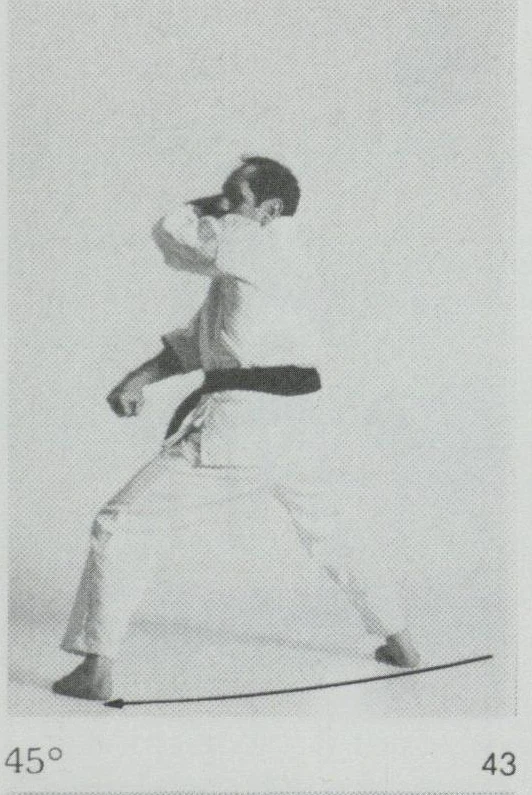
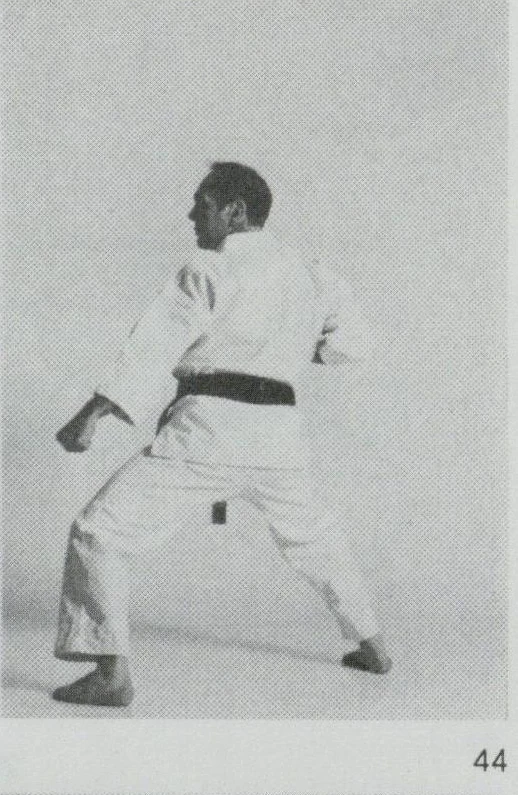
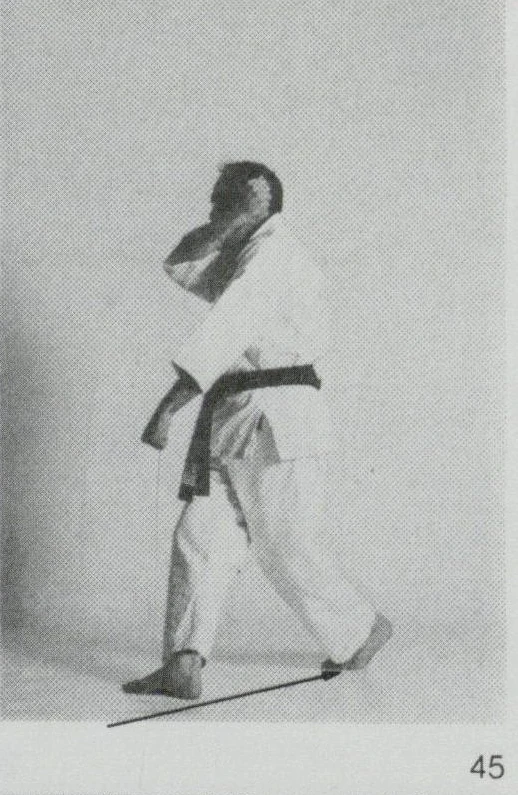
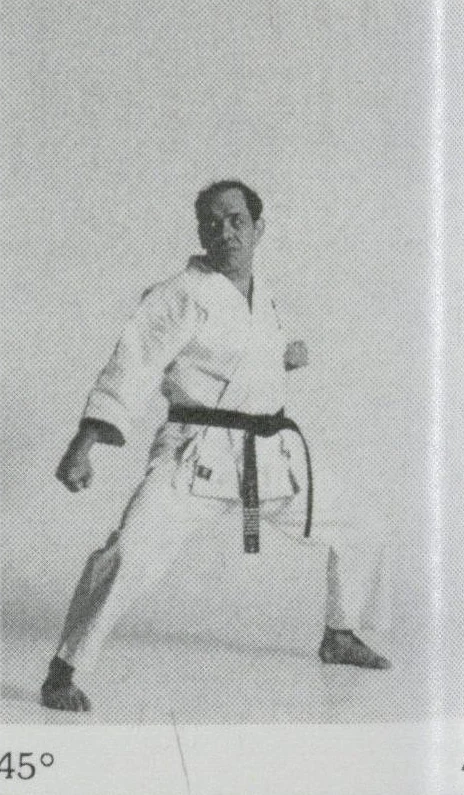
Take your left foot back at the same angle into kiba dachi and block right mae gedan barai (figs. 45 and 46).
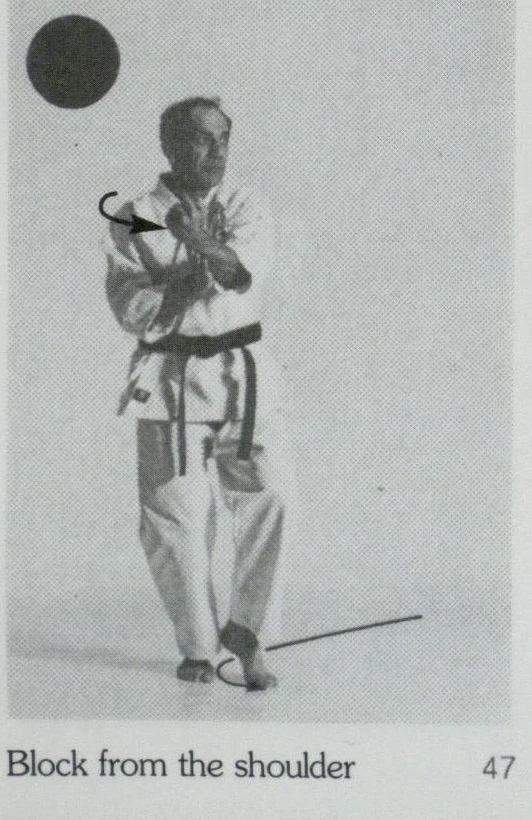
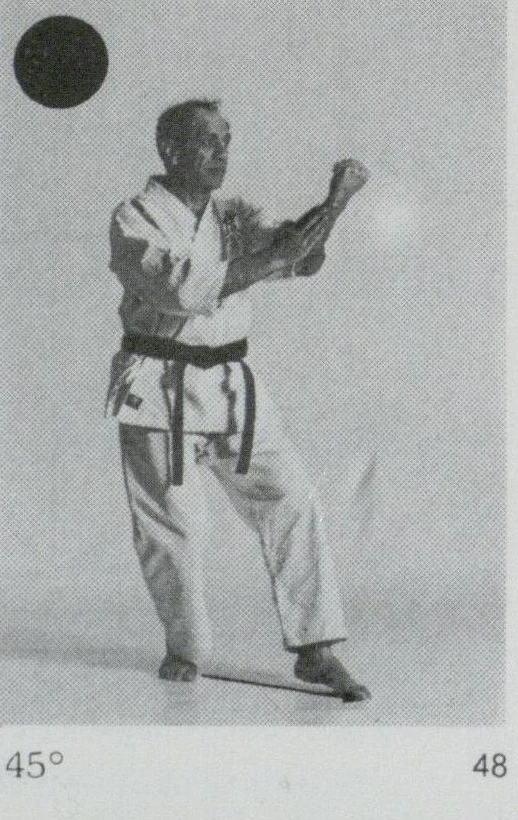
With your left leg move forward in a circular movement into left kokutsu dachi at 45° and slowly block left morote chudan uchi uke as previously explained (figs. 47 and 48).
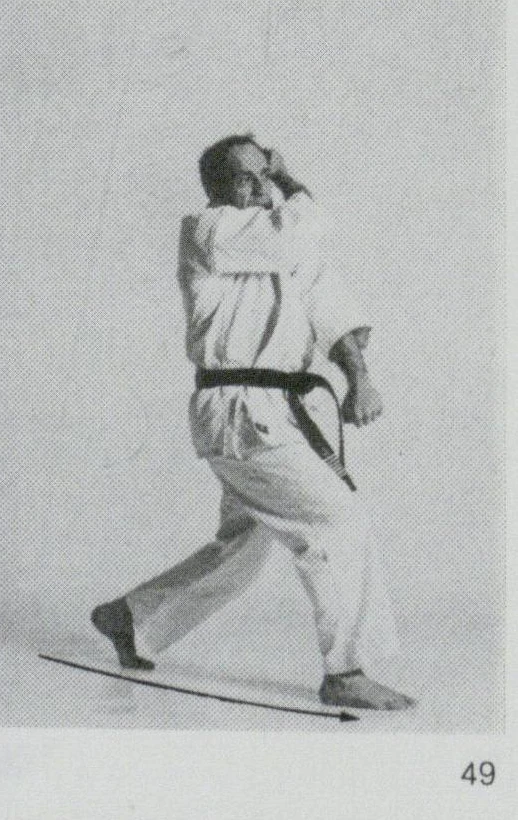
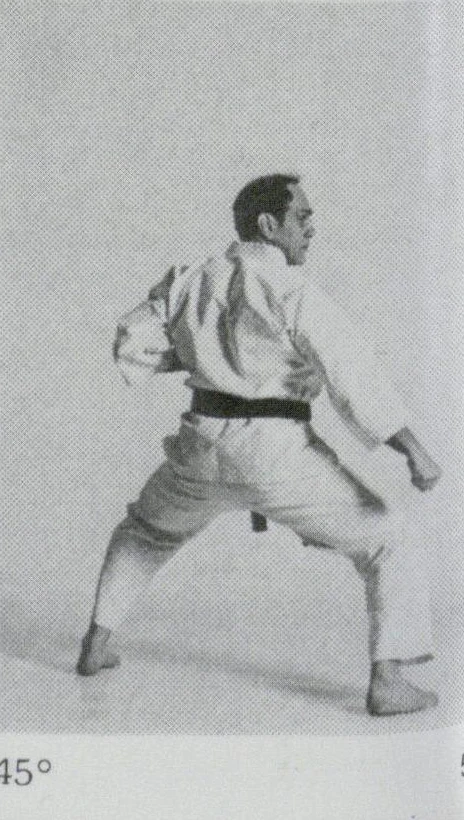
Move forward with the right leg at an angle into kiba dachi and block right mae gedan barai (figs. 49 and 50).
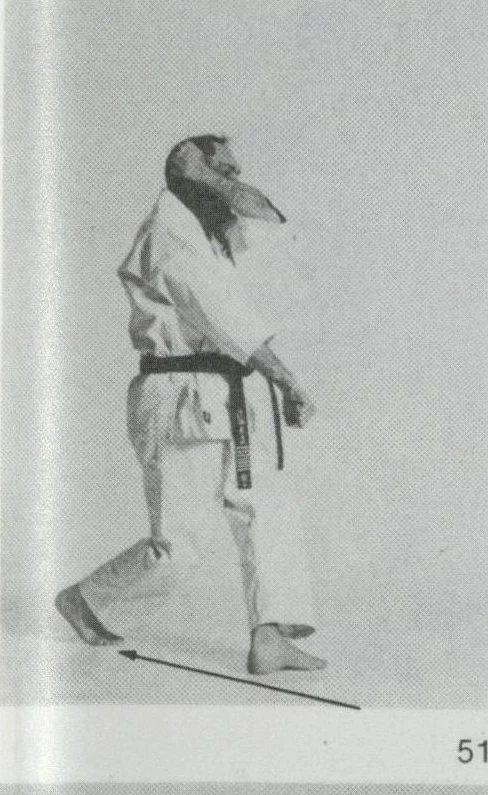
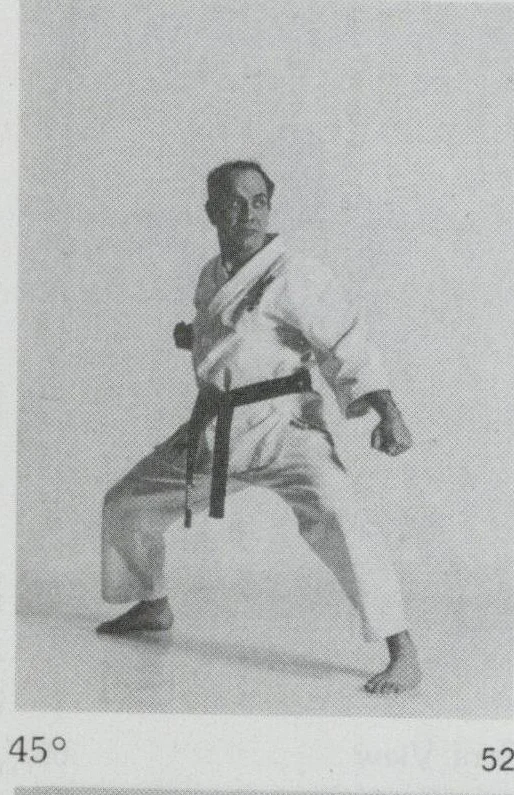
Take your right leg back at the same angle into kiba dachi and block left mae gedan barai (figs. 51 and 52).
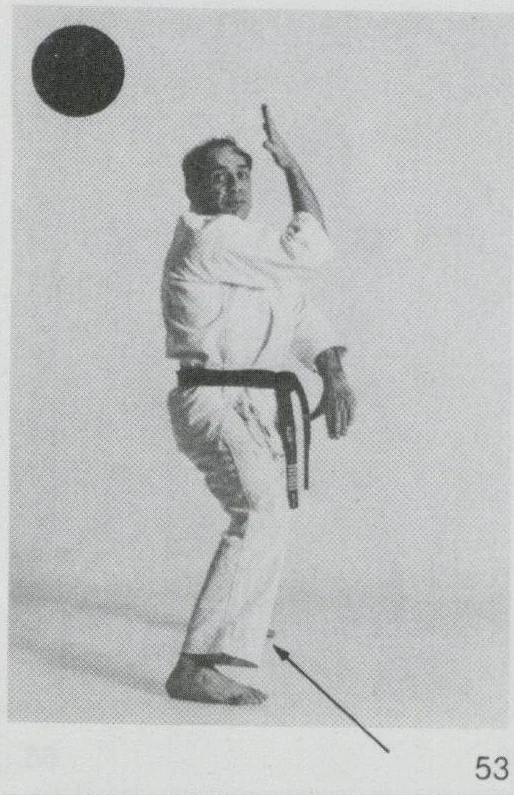
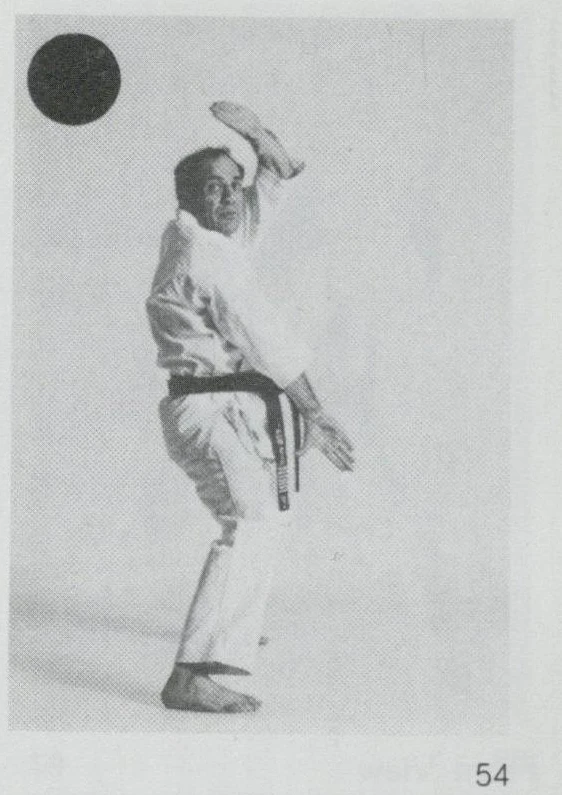
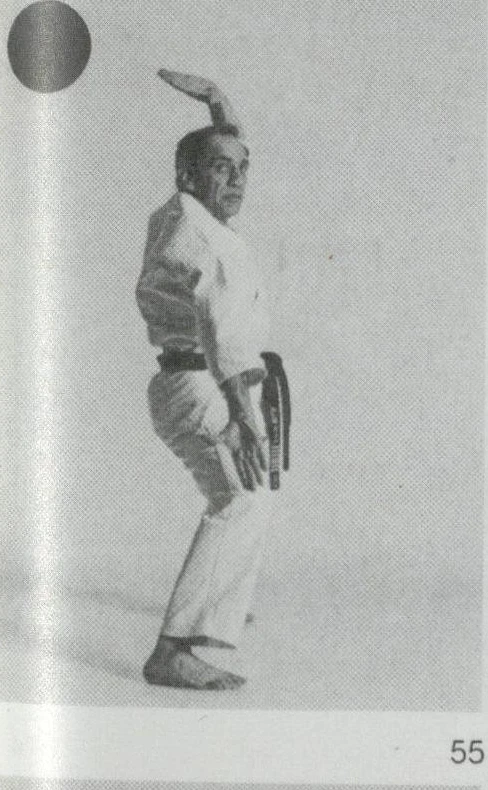
Move the left foot back into mae kiba dachi (i.e. moving the body 135°) and execute a kataguruma (judo throw) (n.b. the hands should be open at the beginning of the throw and the upper hand should be held slightly above the head as indicated, with the thumb pointing straight out) (figs. 53 to 55).
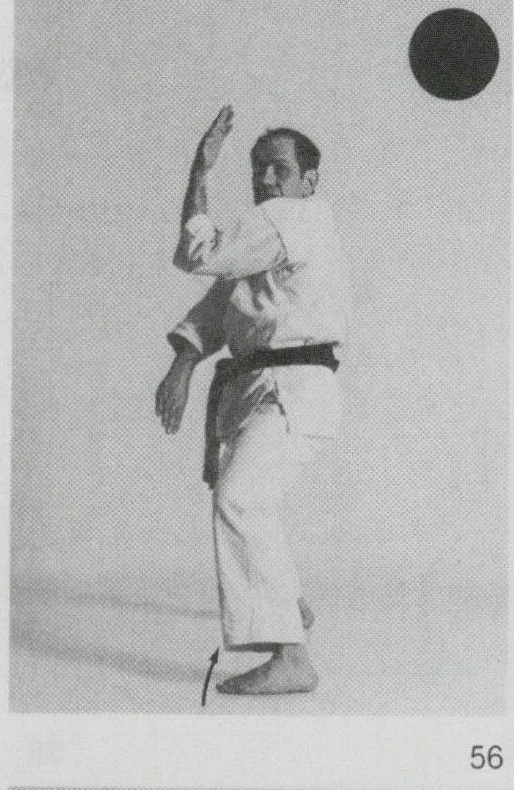
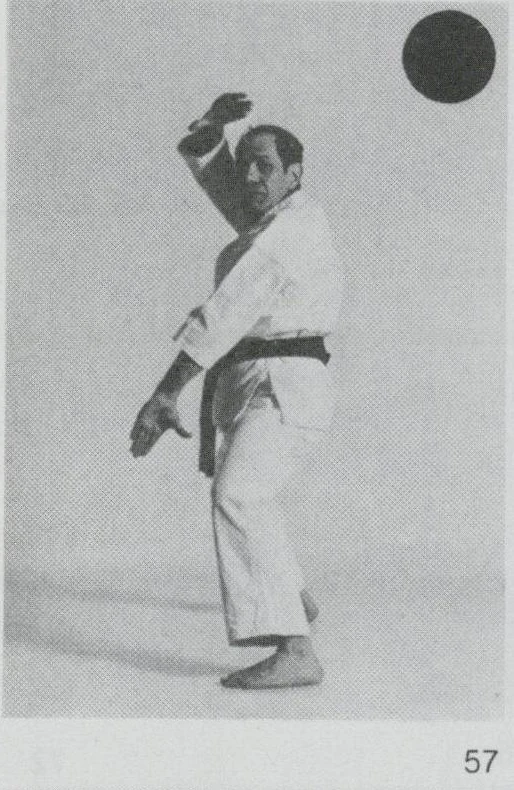
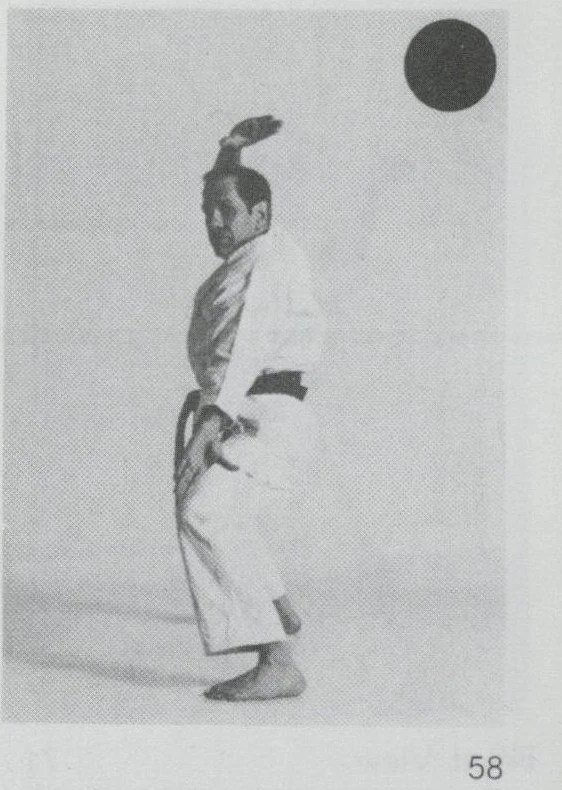
By moving clockwise 180° take the right foot back into mae kiba dachi and repeat the kataguruma as previously described (figs. 56 to 58).
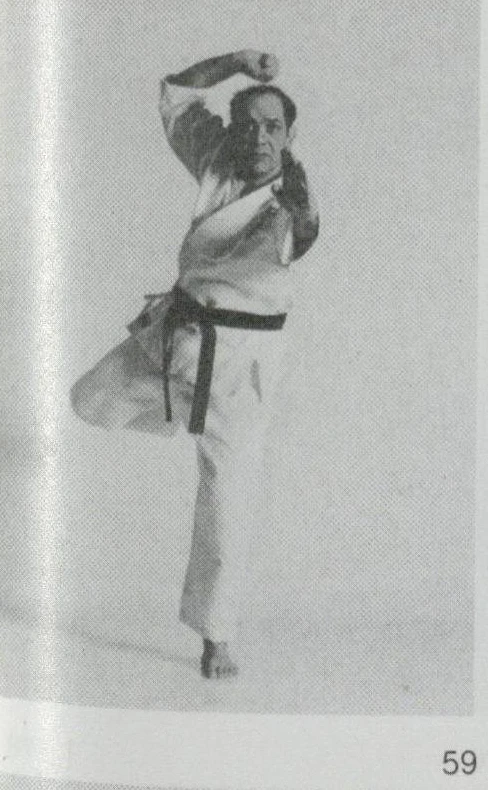
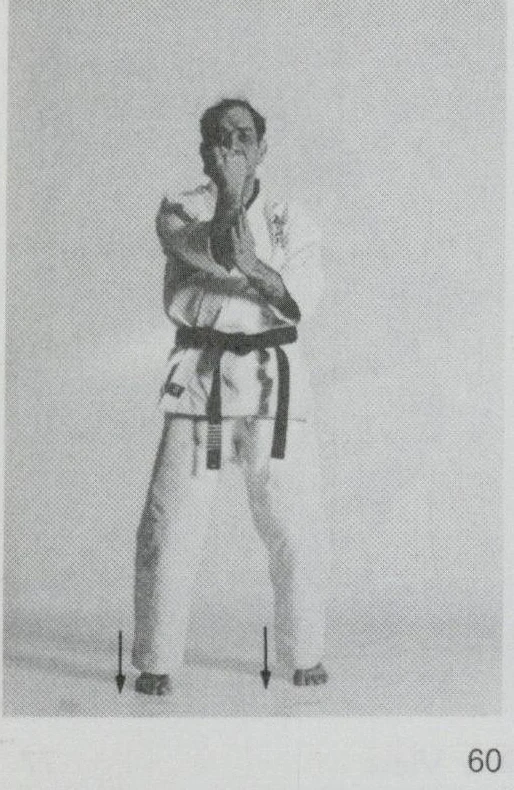
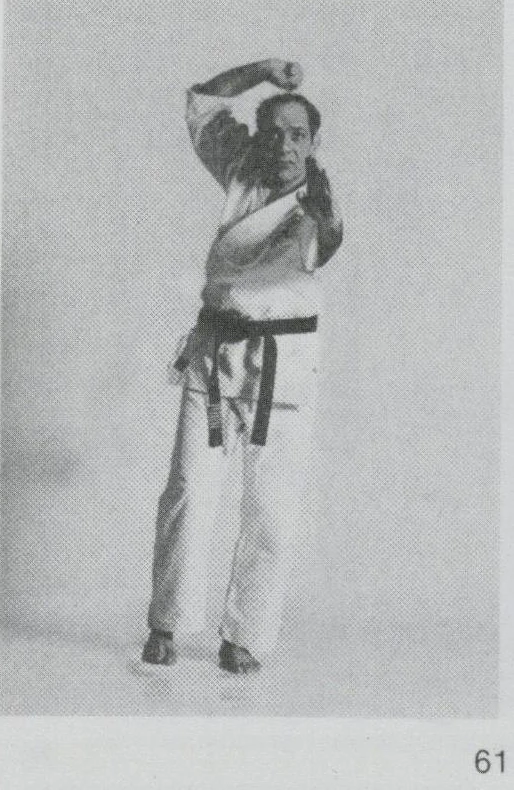
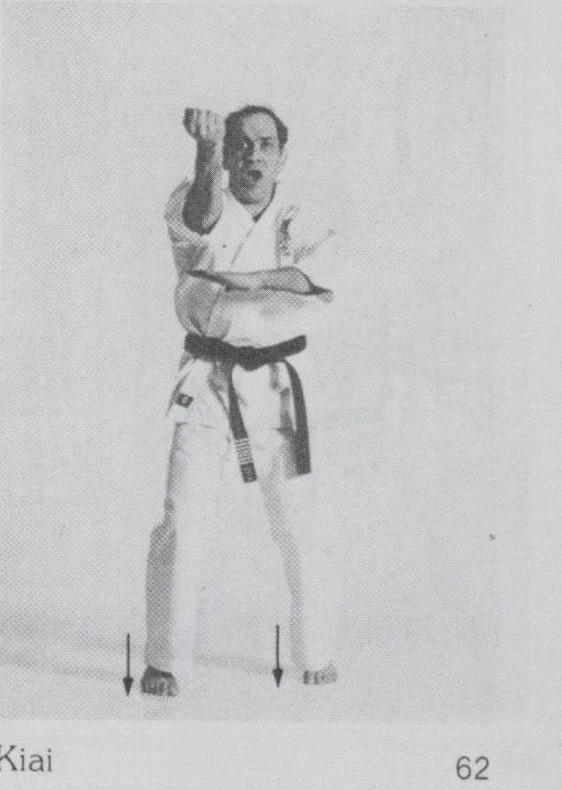
Move forward covering with a left shotei into right moro ashi dachi by moving the right leg initially into age ushiro kakato geri and block right chudan soto uke hitting the palm of the left hand (figs. 59 and 60), followed immediately by moving forward into right moro ashi dachi simultaneously covering with a left shotei to the front and bring the arm in a downward direction into osai uke and strike uraken oroshi ganmen uchi and KIAI (figs. 61 and 62) (n.b. the left hand remains open, palm down, with the right elbow placed on top of the left hand).
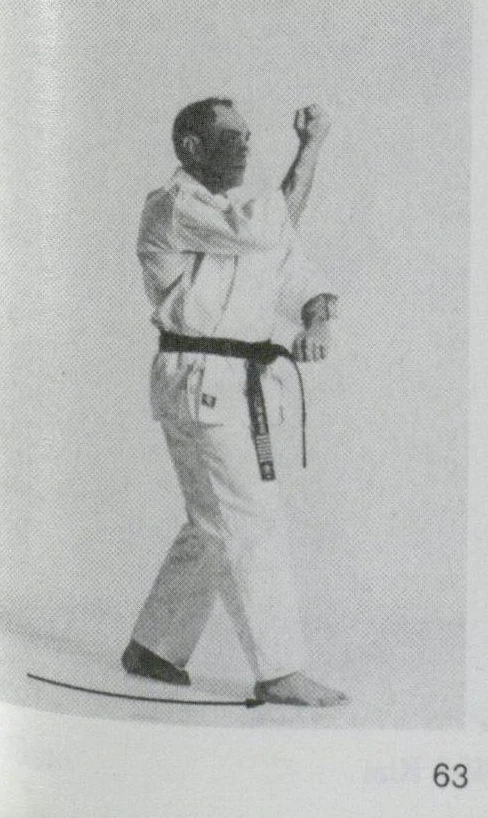
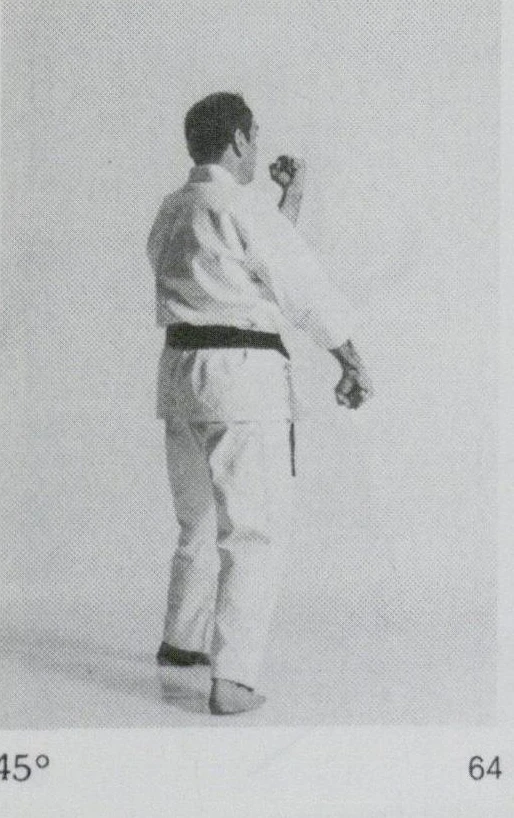
Quickly cross the right foot in front of the left and turn 45° into left sanchin dachi and block left chudan uchi uke, right mae gedan barai (figs. 63 and 64).
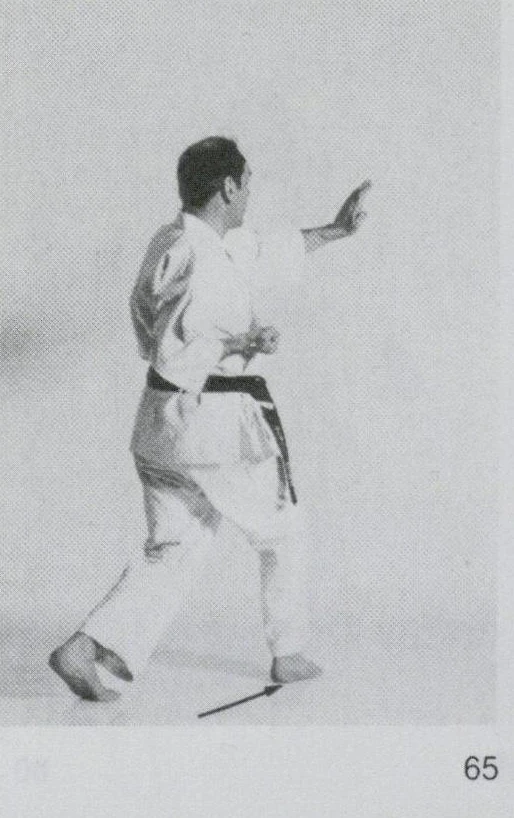
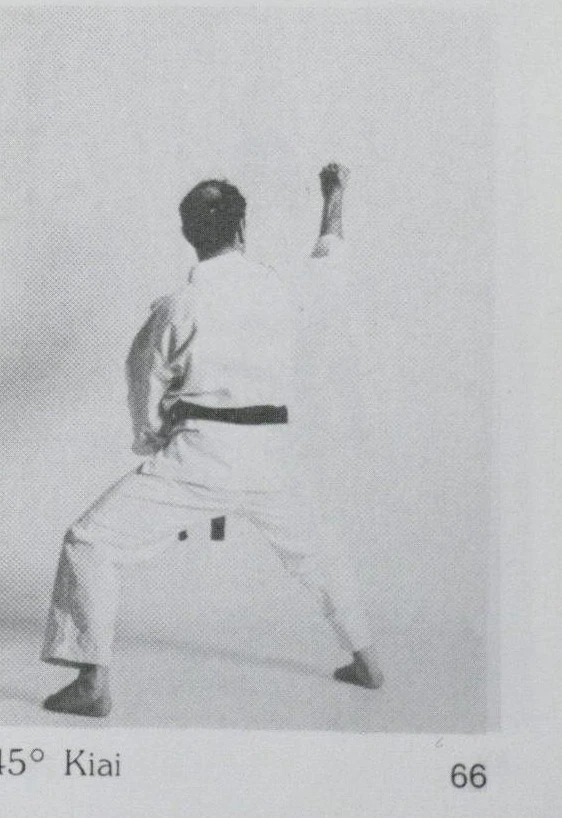
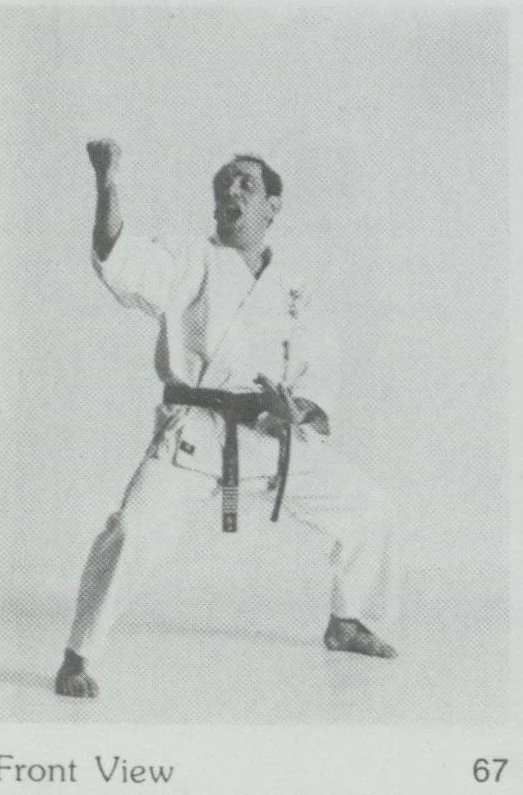
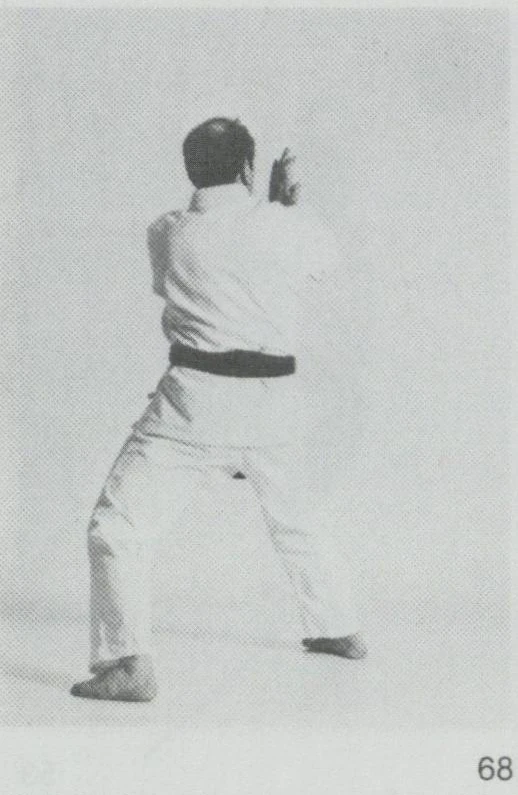
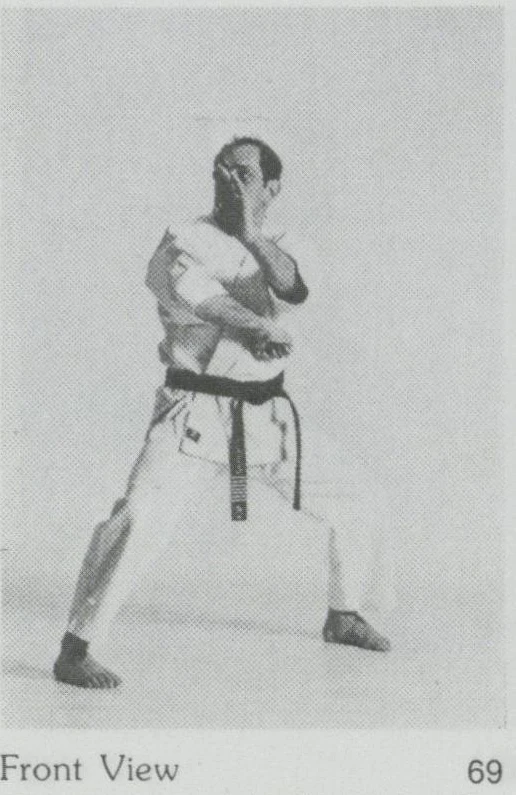
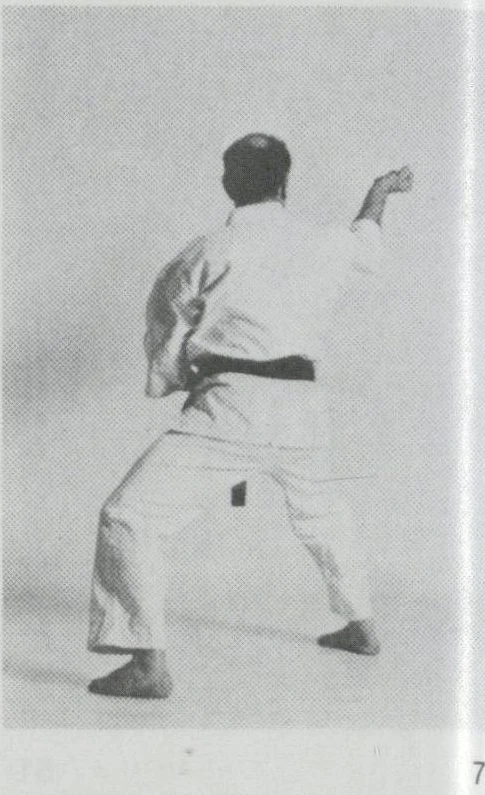
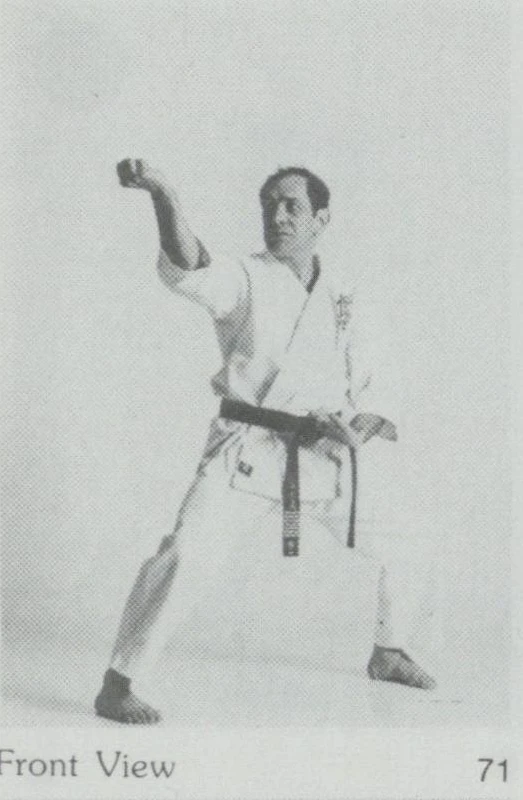
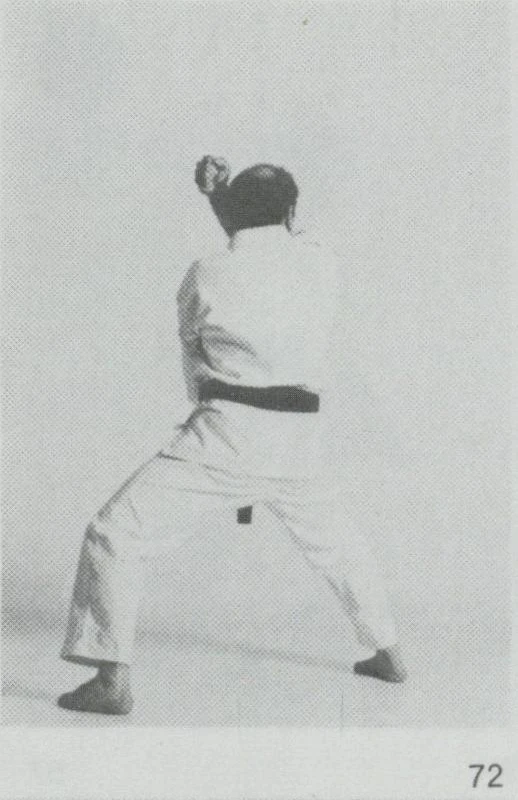
Covering with a left shotei step forward into kiba dachi and strike right age tsuki and KIAI (figs. 65 to 67). In the same stance immediately cover left shotei and strike right uraken sayu ganmen uchi (figs. 68 to 71). Again in the same stance block right mae gedan barai (figs. 72 and 73).
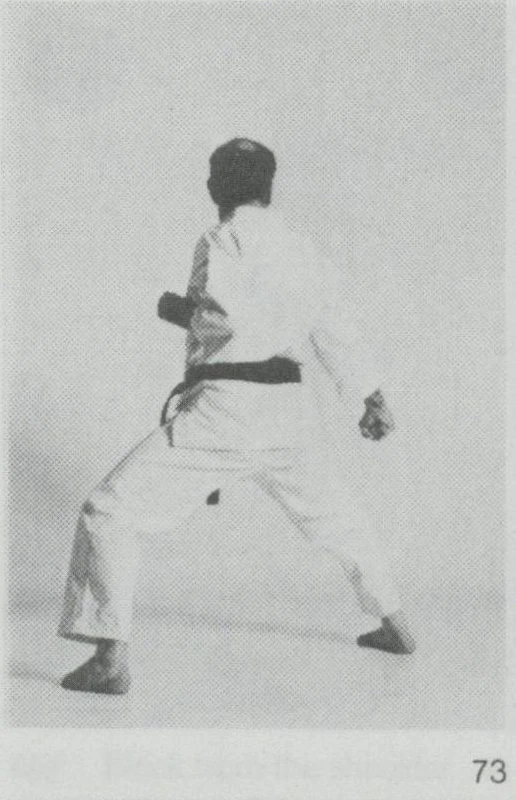
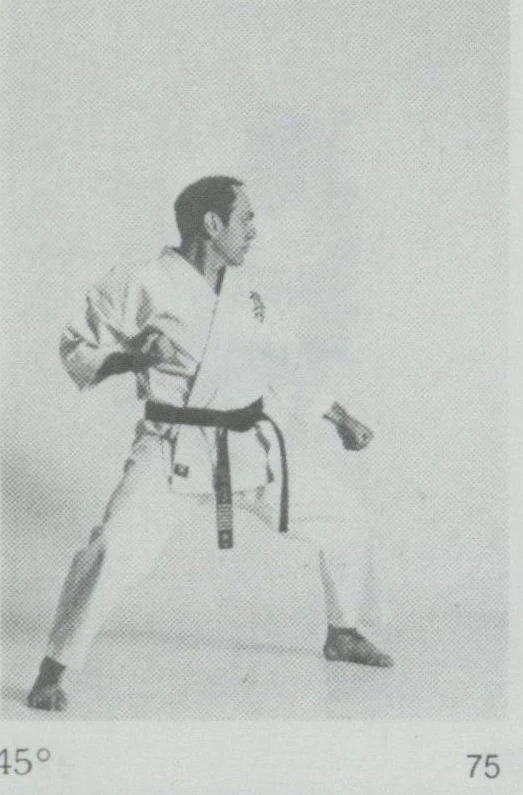
Move the right foot back at the same angle into kiba dachi and block mae gedan barai (figs. 74 and 75).
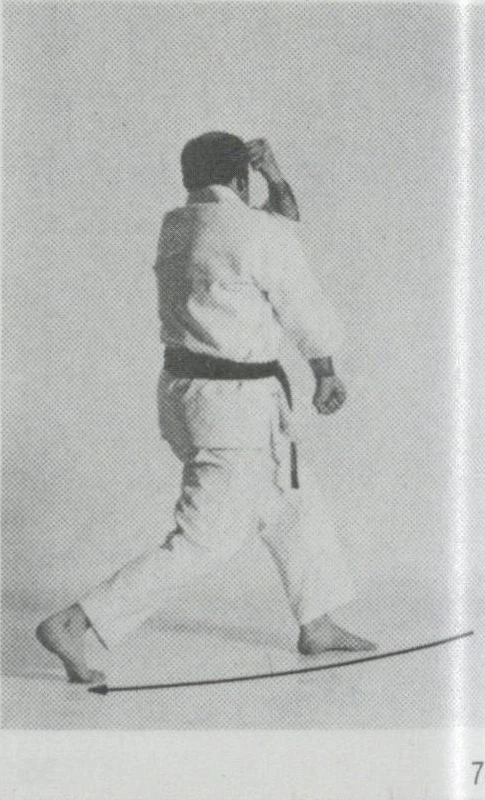
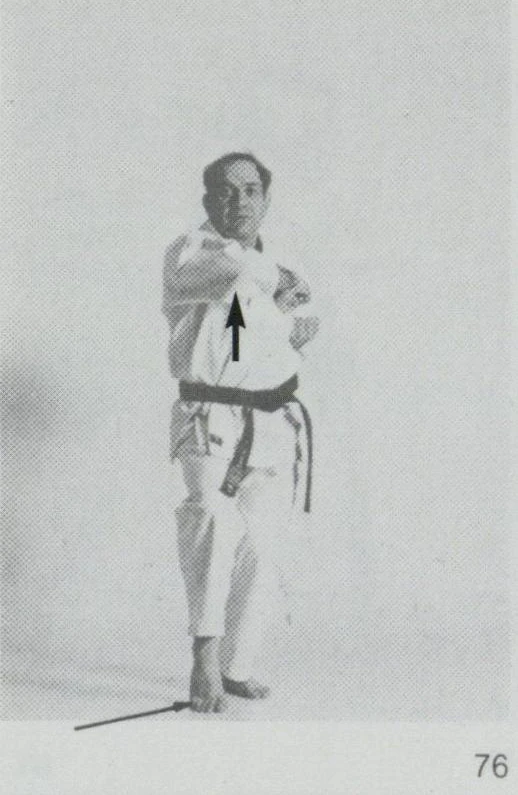
Turn your body to the front pulling the right leg into neko ashi dachi and simultaneously execute a left ushiro hiji ate and right chudan mae hiji ate (figs. 76 and 77).
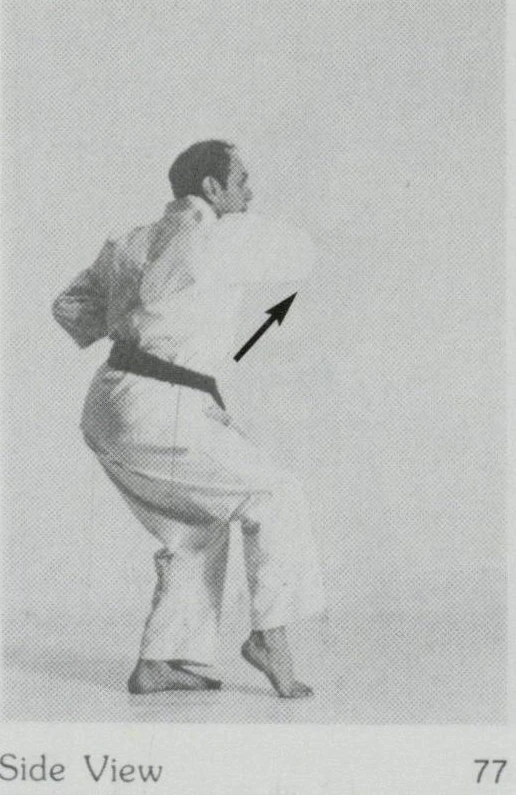
With a slight backward slide, move your right foot back into left neko ashi dachi and simultaneously execute a right ushiro hiji ate and left chudan mae hiji ate (fig. 78).
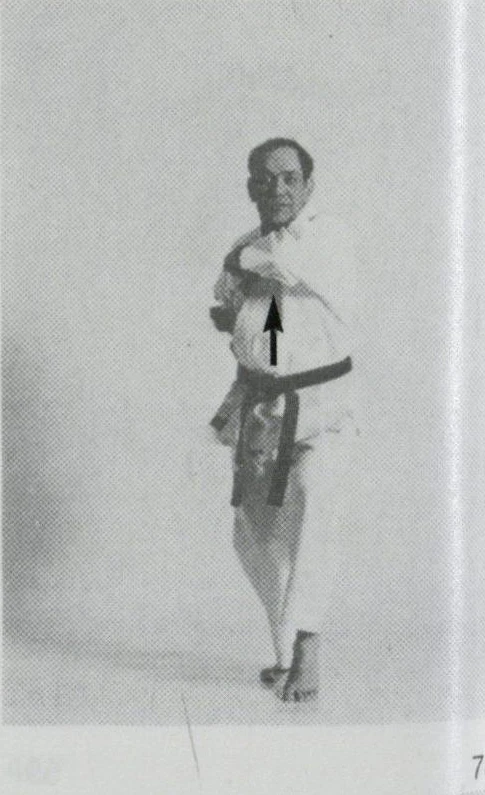
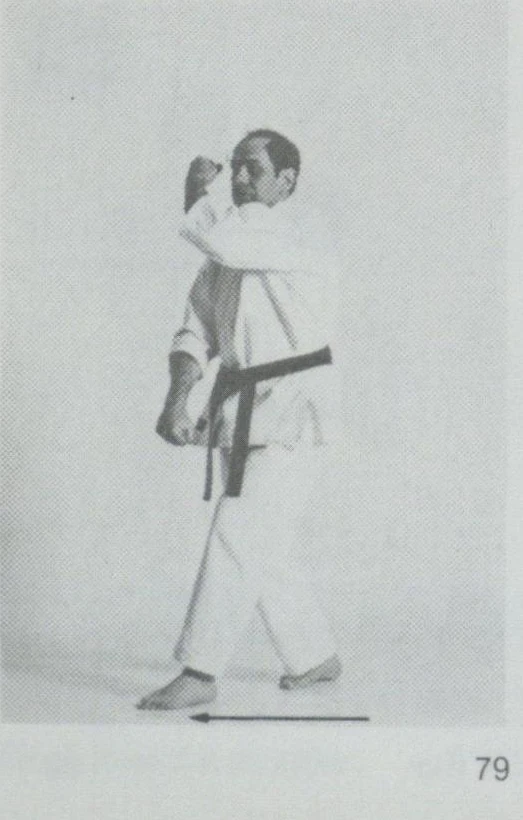
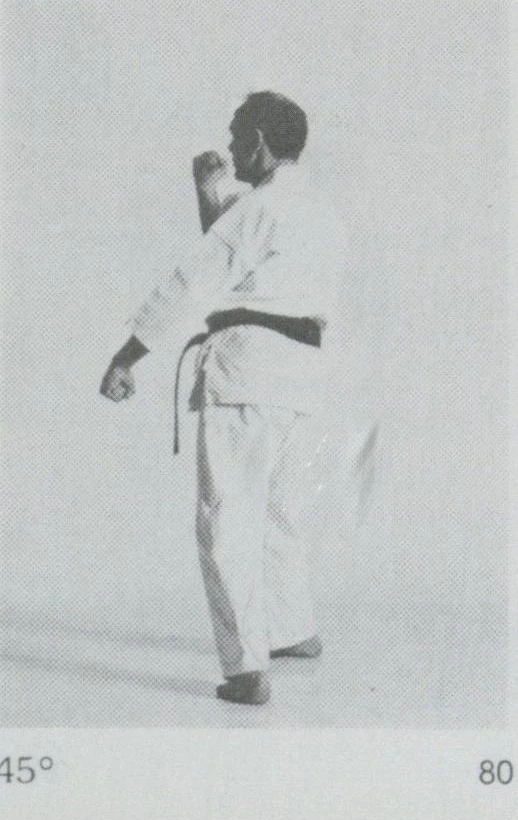
Cross the left foot into right sanchin dachi at 45° and block right chudan uchi uke and left mae gedan barai (figs. 79 and 80).
Covering with a right shotei step forward into kiba dachi and strike left age tsuki and KIAI followed by left uraken sayu ganmen uchi and left mae gedan barai (figs. 81 to 86).
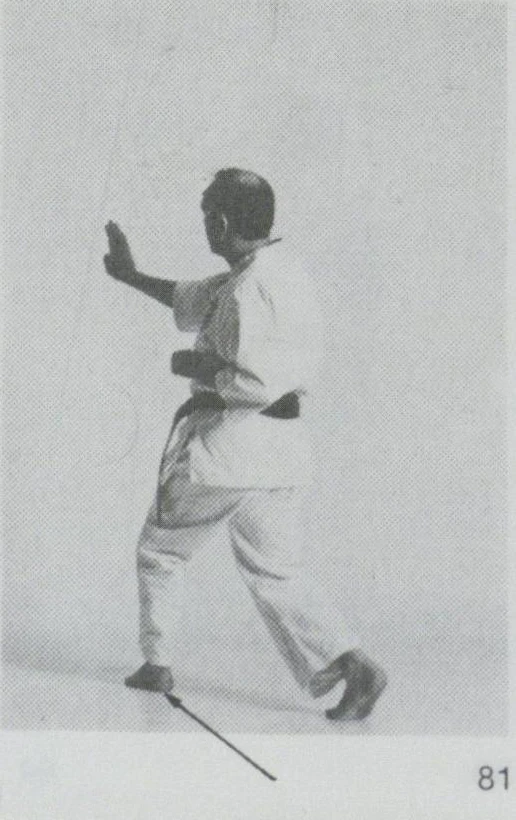
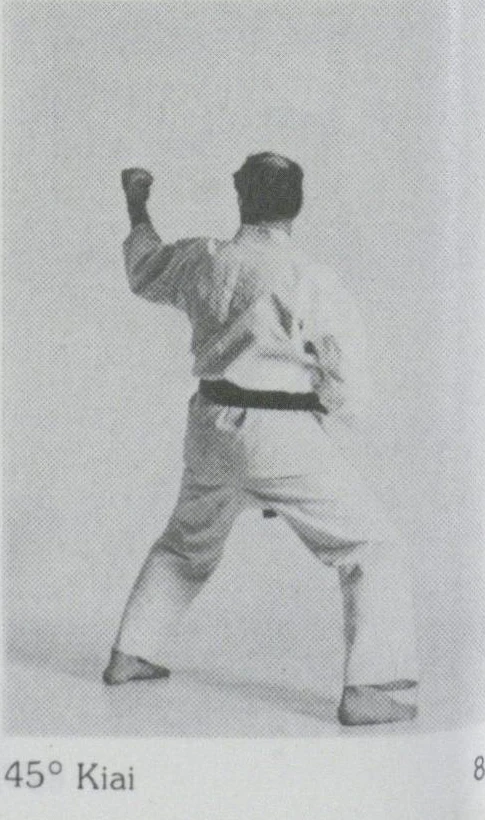
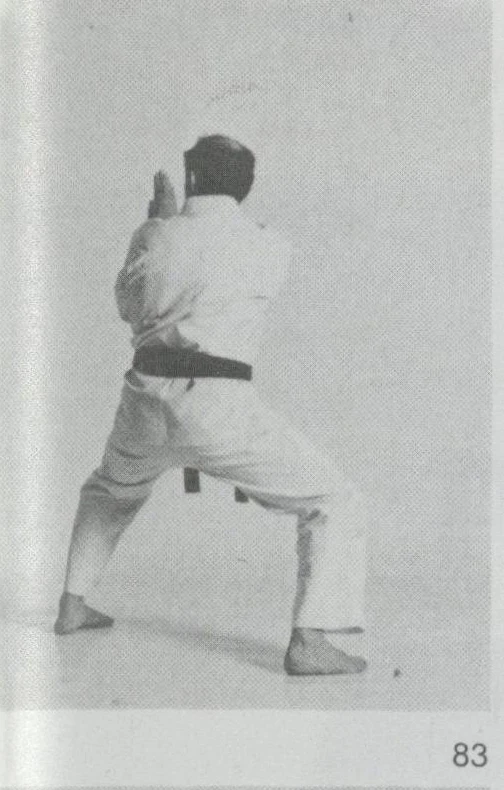
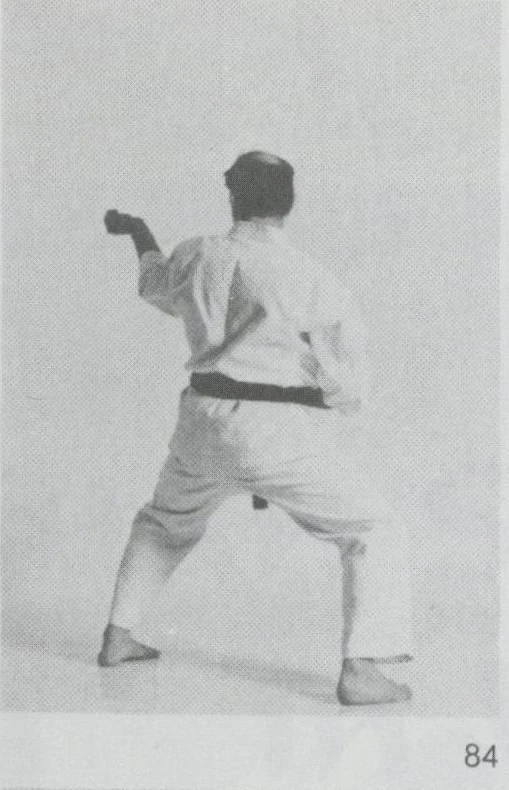
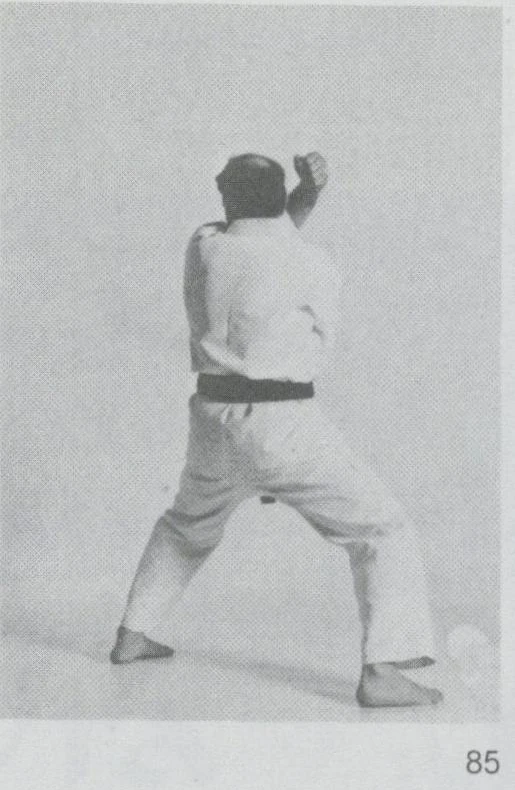
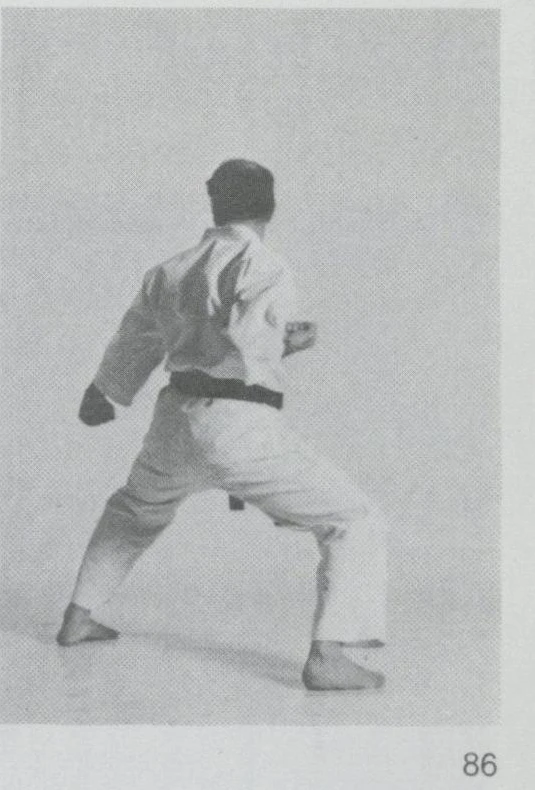
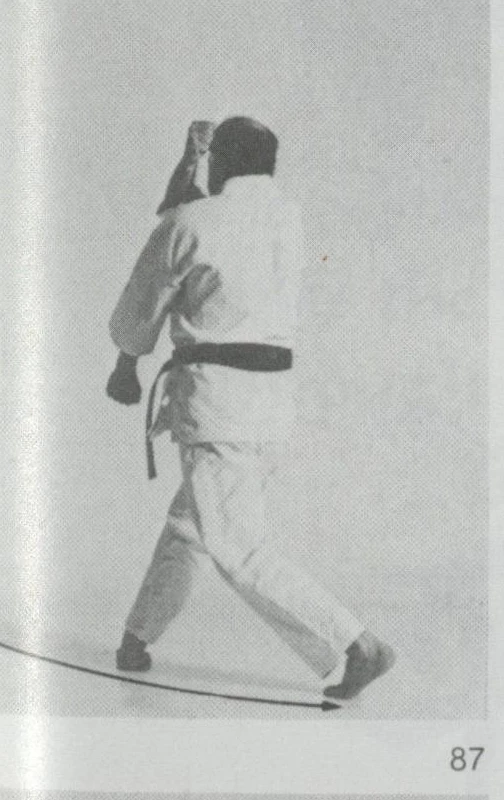
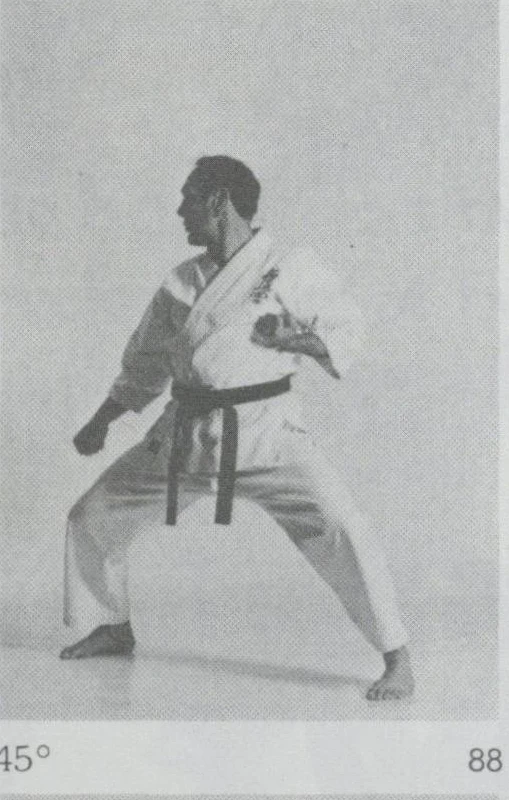
Move the left foot back at the same angle into kiba dachi and block right mae gedan barai (figs. 87 and 88).
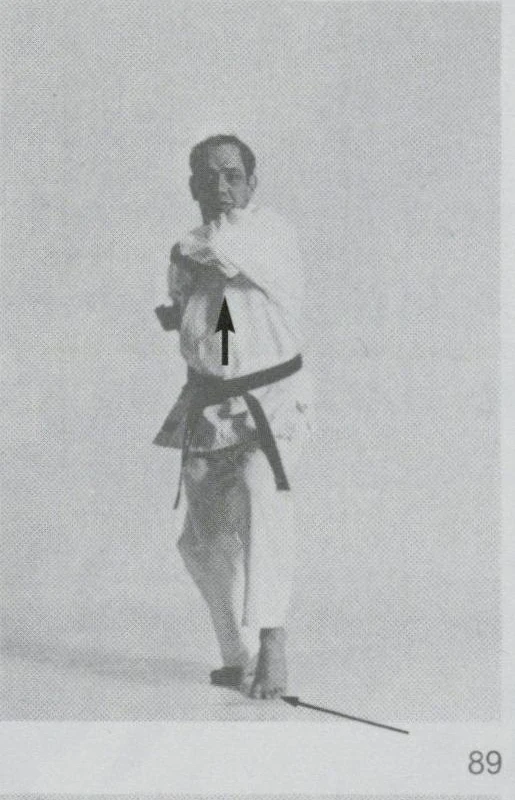
Turn your body to the front pulling the left leg into neko ashi dachi and simultaneously execute a right ushiro hiji ate and left chudan mae hiji ate (fig. 89).
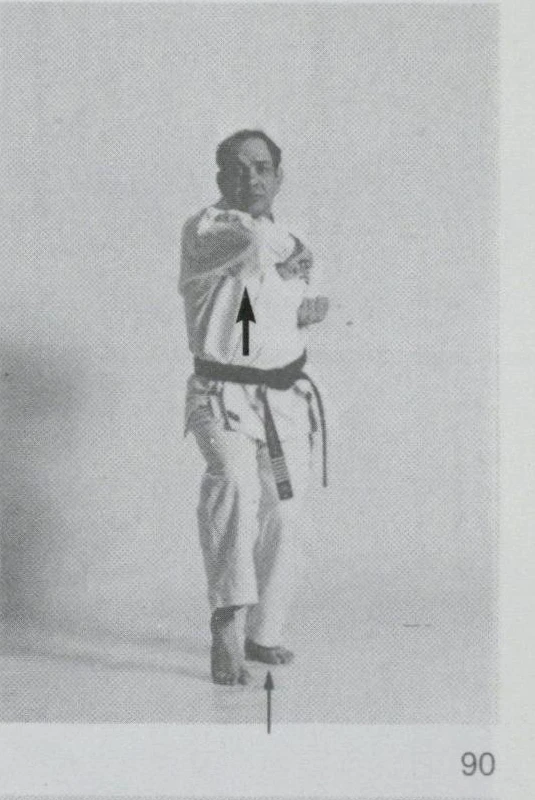
With a slight backward slide move your left foot into right neko ashi dachi and simultaneously execute a left ushiro hiji ate and right chudan mae hiji ate (fig. 90).
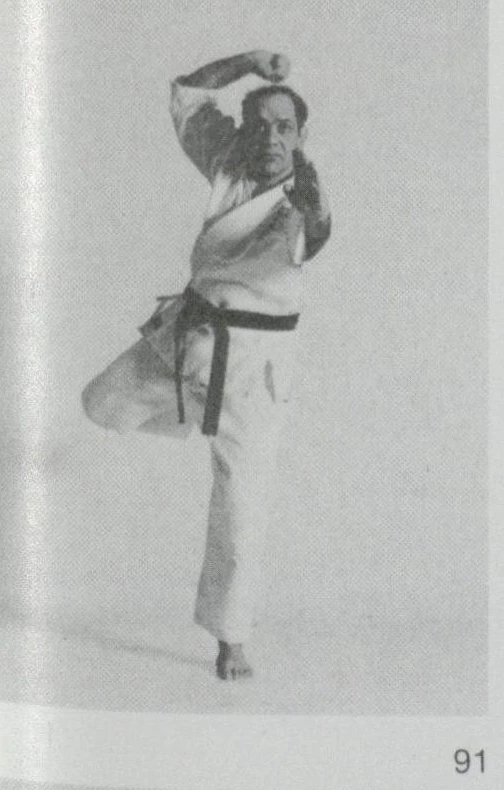
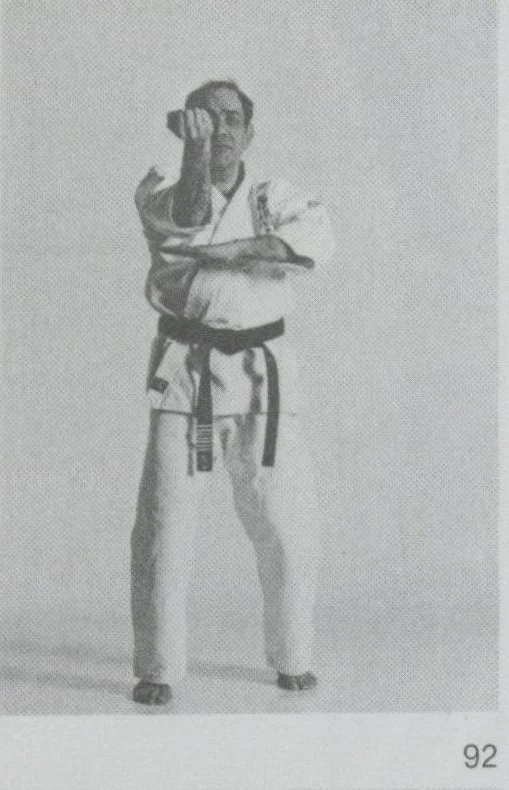
Move forward covering with a left downward shotei cover into right moro ashi dachi by moving the left leg initially into age ushiro kakato geri and strike right uraken oroshi ganmen uchi (figs. 91 and 92). (N.b. the left hand remains open palm down with the right elbow placed on top of the left hand.)
From this stance jump upwards kicking left tobi jodan mae geri (fig. 93) with natural backwards drift maintaining distance with imaginary opponent.
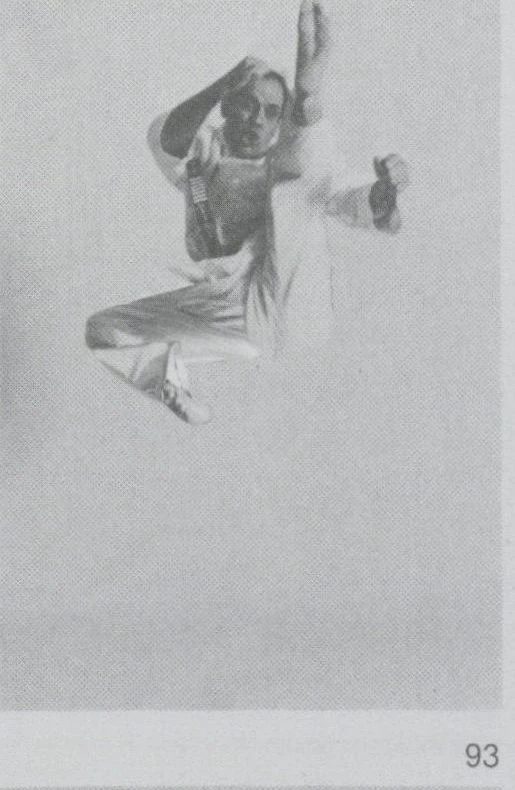
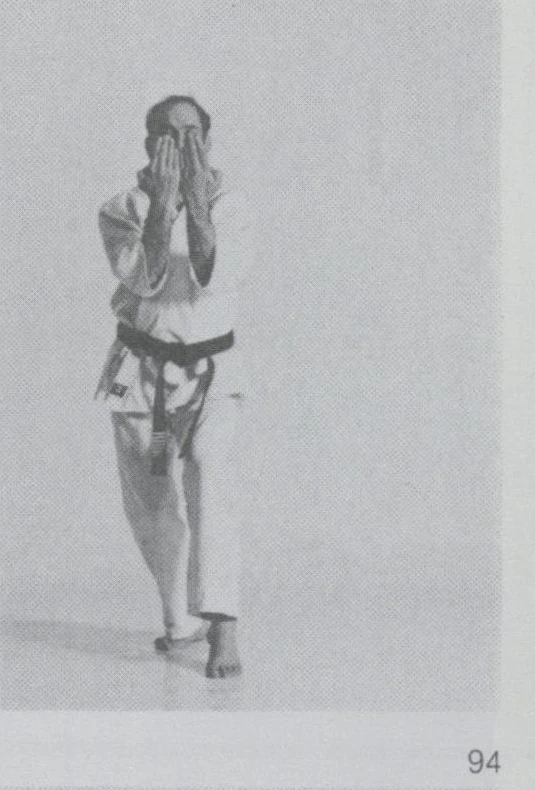
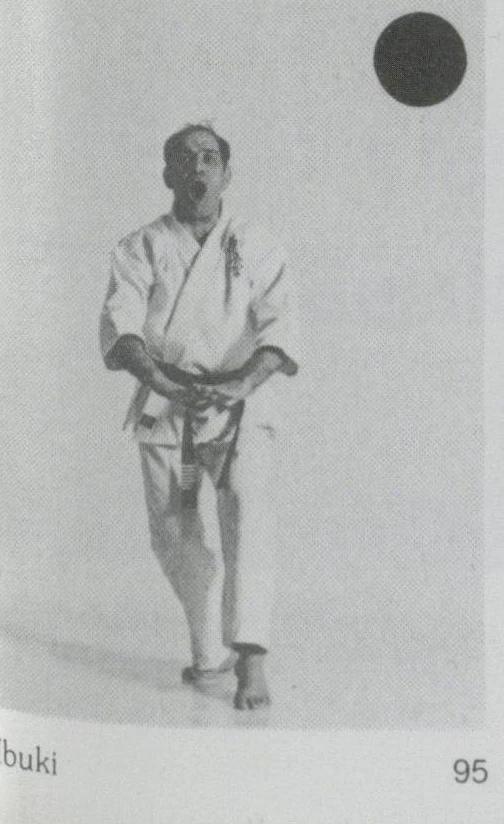
From the kicking position land into left kokutsu dachi with the arms positioned with the elbows together, hands open at face level (fig. 94). Push the elbows down to groin level with ibuki (fig. 95) (n.b. fingers touching and pointing to the front and thumbs touching).
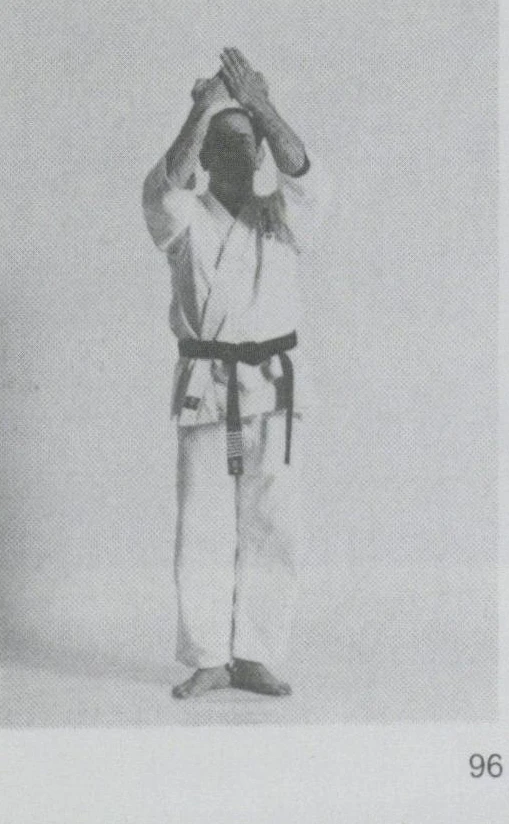
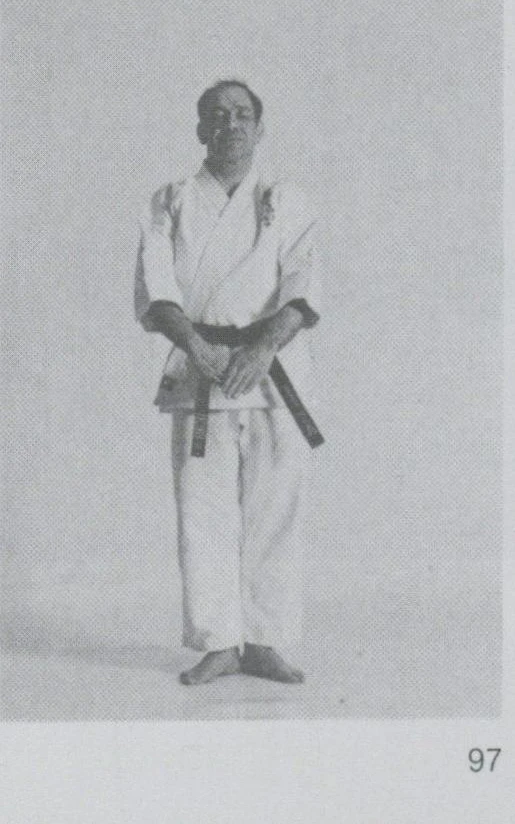
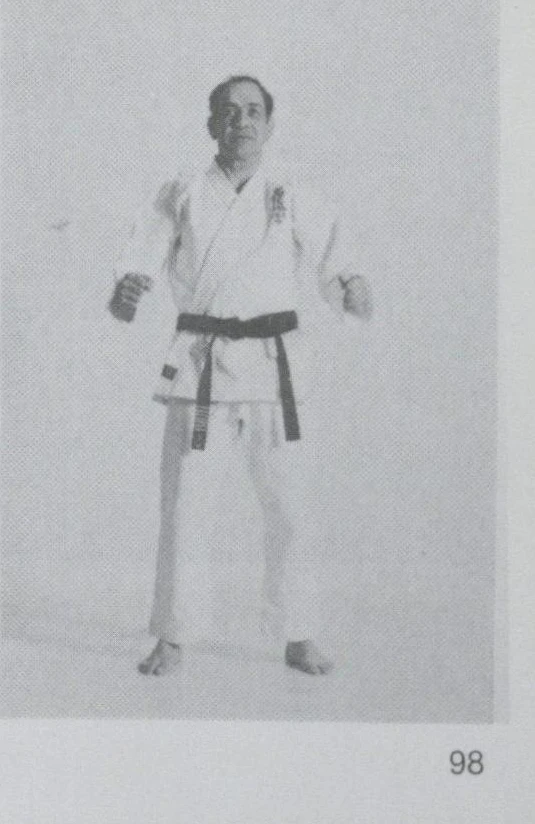
The kata is completed by moving the left leg back into musubi dachi (figs. 96 and 97) and the mokuso position is retained until the command “Naore” when the fudo dachi position is taken (fig. 98).
Ready to Start Training?
Train with us in Wimbledon and start working towards your first grading.
Join Our Classes